

Creating a Shopify Theme that encourages customers to buy from your shop takes work, but how well you cater to the customer after they purchase can be even more important. The experience that you provide post-purchase often dictates if customers will continue to do business with you, and returning customers are the lowest cost of acquisition of any other marketing channel. For this reason, many of the most successful shops have developed systems to provide customers with unique workflows.
In this article, we’ll look at how to use Shopify’s API to automatically track and analyze new orders, make certain decisions, and tag the customer in Shopify in order to reference their account for the future.
Prerequisite
Before we get started using Shopify’s API, you must be familiar with generating an access token and calling the API. If you’re not already doing so, no worries. Check out my previous blog post on how to create an API token.
As with that post, I will be working with the PHP development language, so you must have a development environment for that in order to follow along.
A Senario
Imagine a scenario where you have customers ordering a certain amount of a product SKUs and you call these customers “VIPs.” They’re your best customers and you want to give them a special experience, so you:
- Reward them with a discount code over email for their loyalty.
- Automatically capture their payment since you know their billing is legitimate.
- Tag their account to be referenced later so that you don’t drop the ball on getting their shipment out on time.
Using Webhooks
Let's get started by implementing a webhook on your shop. A webhook is like a “server-to-server” response that says, “Hey, I got an order and here it is.” When you receive a successful Webhook back, it will contain a JSON string telling you who the customer is and what they ordered, among other things. To create a webhook, run the following API call:
The code above will tell Shopify:
- Send new orders that come in only. Check out the Shopify documentation for more information on all of the “topics” available.
- Send the order data to a URL at RequestBin, which is a really neat and free tool to use to test most Webhooks.
- Send it in JSON format.
Step 1: Analyzing Order Data
Since we’re using RequestBin, when new orders are created we should get a giant JSON response returned there. Then in order to be sure the customer is a VIP, we will need to grab several JSON variables:
- "line_items" array to look at the products ordered.
- "contact_email" variable to get the customer’s email address.
- "id" variable for referencing the order to capture any necessary payment.
- "id" variable for referencing the customer (found under the "customer" array)
For the purposes of this example, we will say that VIPs are any customer who ordered three or more products at once. So, let’s start by looking at the “line_items” array in this example JSON response:

Each array within this one will list each product that the customer had ordered. We’re only looking to see if they ordered three or more:
As you can see, the code above will end with the variable "$vip_customer" defined. If it's "TRUE", that means the customer is a VIP and we should continue working with their account.
Step 2: Reward the Customer
If they’re a VIP, we need to send them an email with a discount code as a thank you. Sending an email can be tricky sometimes because there are a lot of rules within email service providers (Gmail, Yahoo, etc). For this reason, it’s a good idea to use a service that does all of the boring compliance stuff for you. Mailgun is a good option since they have a free tier and it’s pretty easy to integrate.
Here is some Pseudocode to help you get this running:
Step 3: Capturing Payment
We already know if this customer is a VIP or not. If they are, we’re going to assume that it is okay to capture their payment, and that the fraud risk is minimal on this order. We’ll need the order ID from the JSON response to accomplish this within the following API call:
If the payment was successful, you should get a response (in the "$capture_response" variable) that looks something like this:
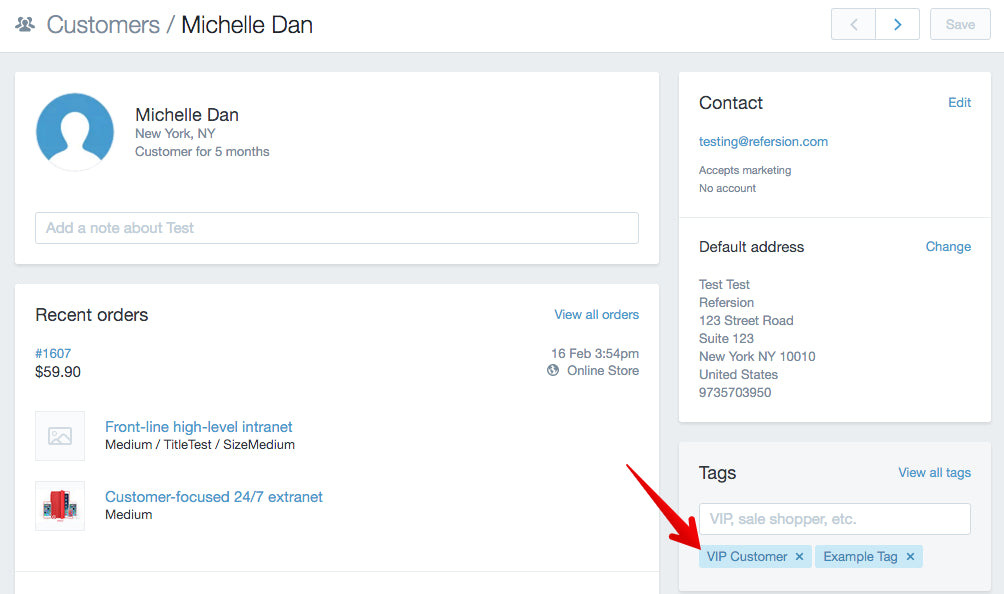
Step 4: Tag the Customer
Finally, we want to tag the customer in Shopify so that we can be on the lookout for when they re-order, as well as improve other processes going forward. Customer Tags show up in the order details within your Shopify admin panel:
Let’s create a tag for the customer that ordered in our webhook. As I mentioned, you need to grab the customer’s ID number that Shopify automatically created for you. It’s a bit trickier than the others, but you can find it in a variable called "id" that is nested under an array called "customer":

Now that we have their ID, let’s create a tag for their account called "VIP Customer":
What's Next?
We’ve done a lot in this tutorial but what does it all mean? My intention certainly isn’t to tell merchants how to run their businesses, but what I hope is that I’ve planted a seed in your mind about how you can build on your existing network of customers to improve on your marketing — especially when it comes to automation. What happens after the purchase is probably the best-kept secret of seasoned Internet marketers. Now, you can do it too and I can’t wait to see what kind of “flows” you come up with.
