

A lot of people have heard of Git, but have never actually used it before. It can be an intimidating subject, and especially challenging for those who don’t have experience with the command line. It becomes more important to think about how to keep track of all the changes we make in our code as projects become more complicated, when we collaborate with other developers, or when we just want to know what’s been worked on or fixed in a project.
Git has a lot of magical powers, and admittedly, in every course I’ve ever taken on Git I always learn something new, because there are so many ways of using Git. This is because Git is vast – there’s so much to learn that it can be hard to know where to start. My intention with this guide is to help you understand what Git is, how to use it, and what that workflow can look like when working with Shopify themes.
This guide is divided into three chapters, navigate through the table of contents to find what you’re looking for:
Git guide - Chapter one
- Common terminology
- Installing Git
- Creating a repository
- Working locally
- 'Syncing' your changes
- Learning when and what to commit
- Get started using Git
Git guide - Chapter two
- Understanding states
- Understanding and generating SSH keys
- Reverting commits and stepping back in time
- Further readings
Git guide - Chapter three
Chapter One: Getting Started With Git
So... what the heck is Git and why is it useful?
Git is a distributed version control system. What this means is that Git helps you track changes to your code and collaborate with other developers. Version control helps to keep track of every change to your code in a special kind of database, helping to ensure your changes are tracked to avoid terrible things from happening 🙈. For example, if a mistake is made, developers can turn back time and compare earlier versions of the code to help fix the mistake, while minimizing the effect on other team members.
It’s also great for collaboration — in the chapter two of this series we’ll discuss Git branches and what that means for collaboration. However, it’s important to note that using Git in your development workflow enables you to compare changes between different versions of the same code, as well as combine code changes between team members, and choose what to keep and what to discard if there are conflicts.
Common terminology 🤓
One of the most intimidating things about learning Git is all the fancy new terminology that comes with it. I’ve listed out a bunch of common definitions that I think will be useful for someone getting started with Git to understand:
Local refers to your own copy of the repository, or code that lives on your computer or server.
Remote refers to a copy of the repository, or code that lives on another computer or server.
Repository is the data structure and system that stores the history of your files and your code, for example a set of files or code in a directory that is tracked by Git, is considered a repository.
Initialize (git init) turns a directory or folder into a repository, meaning that directory’s changes are tracked by Git.
Clone (git clone) grabs a copy of your code and all its history, often from another computer or server.
Commit (git commit) refers to saving the state of your files — think of a commit like a snapshot of what your code looks like at a particular moment in time.
Pull (git pull) gets the commits from a remote repository.
Push (git push) sends your commits to a remote repository.
Revision refers to the version of a file (or files) in the Git history of a repository.
Branch refers to a copy of your code, with a series of changes that are different to the original copy.
Merge combines your changes to the code with another developers’ changes.
Now that you know some basic Git terminology, let’s get into installing Git and creating our first commit and repository!
Installing Git
Depending on your operating system, you’ll have to install Git in a slightly different way. You can use Git with the command line (Terminal on a Mac) and Git Bash on a PC, or use Github Desktop (which works on both platforms). There are also instructions for use with Linux on the Git website.
Mac
Open the Terminal application (aka. command line) and check for Git by typing the following and then hitting enter or return on your keyboard:
git --version

If you see a version number returned to you, it means that Git is already installed. However, if you see -bash: git: command not found you’ll need make sure you have Xcode installed (an application on your Mac that comes with Git). You can do this from the App Store.
Sometimes after an update you might get an error that reads Agreeing to the Xcode/iOS license requires admin privileges, please re-run as root via sudo. What this means is XCode will already be installed on your Mac, but you just need to accept the user agreement before it will allow you to access the apps’ tooling and Git.
In older versions of XCode, you might need to install Command Line Tools by going to Preferences > Downloads > Command Line Tools.
Windows
You can download Git for Windows, and using Git Bash you can run all the same commands as if you were using Terminal on a Mac.
GitHub Desktop
Lastly, if you don’t have much experience with the command line or want a GUI to use with Git, you could try out GitHub Desktop. Simply download it from the website, it’s free to use, and works with all platforms. Git Tower is also another popular GUI for tracking changes with Git, however you do need to pay for it, whereas GitHub Desktop is free.

Creating a repository to save your work
There are a lot of different options when it comes to backing up your repositories online. The most popular by far is GitHub, and if you’ve already chosen to use the GitHub Desktop app mentioned above, I highly recommend you signup for a GitHub Account.
There are also other sites like BitBucket and GitLab that are free to use, with paid plans for larger teams. GitLab has free private repositories and free unlimited collaborators, which I’ve used before for projects and that have been a great experience in the past. Just a note, GitLab’s API is a bit different than GitHub so if you want to do any kind of deployment integrations, the two don’t parallel perfectly as they have different features.
Create a GitHub account
To follow along with this tutorial, I suggest signing up for a GitHub account.
Create a new repository

Once you’ve made an account, create a new repository by clicking the + and then the New Repository link. You don’t need to initialize a README or add a licence in this repository, as we’ll be adding a Shopify theme to it eventually. Once your repository has been made, it will live at github.com/yourusername/yourprojectname. Your newly created repository should be empty.
If you are using the GitHub Desktop application, you can skip this step.
You might also like: Using Git to Simplify Shopify Theme Deployment.
Working locally with Theme Kit, development stores, and your Shopify Partner Account
To be able to track changes to your theme effectively using Git, you’ll probably want to be working locally on your computer with Theme Kit when you make changes to your theme, instead of in the online code editor (otherwise the process of downloading the theme each time to commit changes to GitHub would be absolutely excruciating).
For this tutorial (and understanding how to commit your theme files with Git) you don’t need to set up Theme Kit just yet, but to do so, you’ll want to follow this tutorial on how to setup Theme Kit, and create a Shopify Partner Account in the process.
You might also like: A Beginner's Guide to Sass with Shopify — Part 1: Getting Started With Sass.
Download a copy of your theme to your computer
To get started, you’ll need to download a copy of your theme to your computer. You can do this by going to the Shopify Admin and clicking on Online Store > Themes > Actions > Download Theme File.
Alternatively, if you have already set up Theme Kit, you can run theme download inside a newly created directory, and your theme will be downloaded into the directory you run the command in.
Important: Make sure that when you name your theme folder or newly created directory that you avoid spaces in the filename. I recommend words-separated-with-dashes whenever naming files or directories.
‘Syncing’ your changes to your Github repository
Set your identity for your global Git settings
One of the first things you should do after installing Git is set your user name and email address — this is important because every Git commit uses this information. From the command line, run the following to set your user name and email globally:
git config --global user.name "John Doe"
git config --global user.email johndoe@example.com

Initialize your local theme directory with Git
On your computer, you should already have a directory containing your theme. To open that directory in Terminal, you can simply drag it on top of the Terminal application and it should automatically navigate to the correct folder. Otherwise, you can type pwd to print your working directory, and cd to change directory to navigate to the correct place on your computer. For example:
cd path/to/your/theme-folder
Once inside your theme directory, initialize the directory with Git. Essentially you’re telling Git to watch these files for changes and turn this into a repository. From inside the theme folder run:
git init

Now that you’ve initialized Git in the theme folder, type ls -la to list all the files in your current directory, including files that start with .. You should see a .git directory in your initialized theme folder. The .git directory is a hidden folder that contains all the information about your project that Git needs to work.

If you’re using GitHub Desktop, click Create a new repository or type cmd N, which let’s you name the repository whatever you’d like it to be called on GitHub — this can be different from the theme directory name, however for consistency, I suggest being pragmatic with your naming from the beginning and naming both folders the same thing.
Link your local directory with your GitHub repository
Now that you’ve initialized Git in the theme folder, you can link it to your GitHub repository, which you previously created. You might wonder, why would I bother doing this, Tiffany? And I would say, it’s because we don’t want our local directory to just live solely on our computer. Otherwise we’ll still run into the same issues of losing information if our computer explodes, or the folder gets deleted by mistake, even if it’s being tracked by Git. We are choosing to back it up to a second server (in this case GitHub) so that we can access it from anywhere with an internet connection, and it’s backed up in a safe place.
To tell Git where we want to link our local repository to, we set a remote by running:
git remote add origin git@github.com:tiffanytse/example-project.git
In the example above, my GitHub username is tiffanytse and the repository name is example-project. You’ll be able to find this command in your empty GitHub repository that you created as part of the instructions.
If you’re using GitHub Desktop, click the Publish repository button at the top right of the app, which will run a few Git commands in the background. These not only set the remote but also push the directory to the master branch of your repository to GitHub. We’ll talk more about branches in the next chapter.
Check the status, add files, and make a commit to master
By running git status you can see which files have yet to be tracked by Git in your theme directory. To track those files, you can run the following command:
git add .
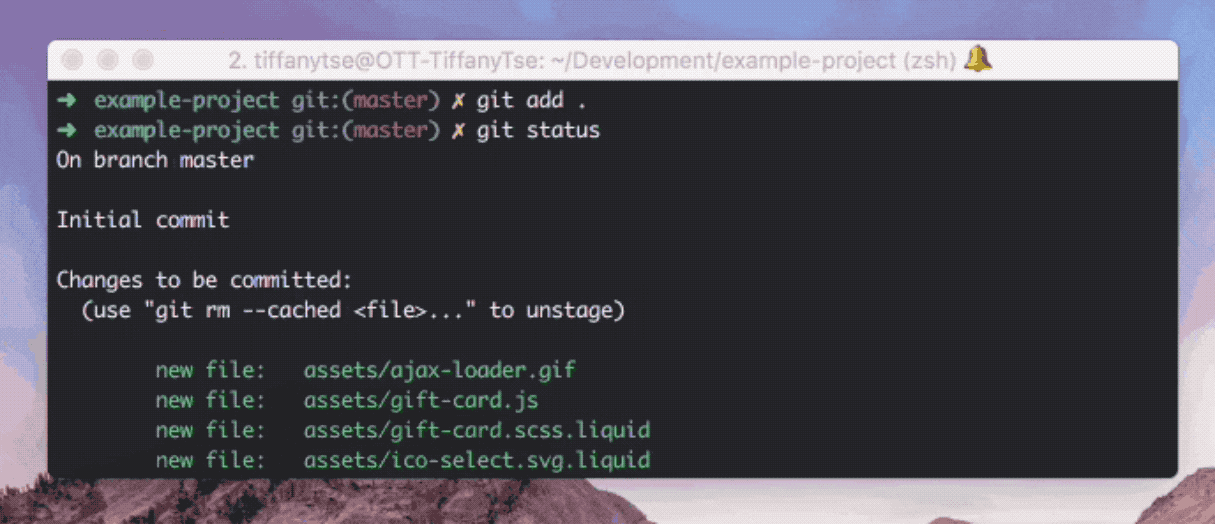
This tells Git to add all the files and directories, except those that are being deleted — make sure to include the . at the end of the command.
Then we’ll make an initial commit to master, by running:
git commit -m "Add all initial theme files"
The -am specifies that you want to add a commit message directly within this command (so you don’t have to try and use VIM in the command line to write your message) inside a set of quotes. I’ve written ”Add all initial theme files” as my message, but you could write whatever makes sense here for you. Often for the first commit, I’ve seen the message ”Initial commit”. The commit message is something that will tell you what changes you made at this particular snapshot in time. I've included some best practices for commit messages at the end of this chapter.
If you’re using GitHub Desktop, you can write your commit message in the Summary input on the left-hand of the app, and commit all the files you want to add to master (checked off files) by clicking the Commit to master button after you’ve typed a commit message.
Sync aka. push your changes to GitHub
When I say the word sync, what I really mean in Git terminology is to push our commit to GitHub, essentially making sure that our local version of the repository is “synced” with the remote repository. To push your theme files to GitHub run:
git push -u origin master
The -u sets the upstream for your repository, meaning that later when you want to pull changes from the repository you don’t need to specify a branch. In this command, origin refers to the remote, and master is the default branch name when you create a repository with git init.
If you’re using GitHub Desktop, click the Publish repository button at the top right of the app to publish your repository on GitHub. After adding additional commits, this button will change to Push origin, and clicking that button will send any commit changes to your GitHub repository.
Ignoring files
One thing to note, that we didn’t really discuss earlier, is how to ignore files. This is especially useful if there are specific files you don’t want to track with Git. For example, if you’re using a Mac you probably want to ignore the hidden .DS_Store files that are automatically generated by the operating system in your file folders.
Additionally, if you’re using a compiler app like Prepros, you might not want to commit the prepros.config file that’s automatically generated.
To ignore files with Git you need to create a text file called .gitignore. Because files that start with . are hidden from directories, you won’t be able to create it from Finder, unless you’ve specified that you want to show hidden files. The easiest way to create a .gitignore is to do it directly from a text editor like Sublime, Atom, or Visual Studio Code.
Create a new file in your theme directory, and name it .gitignore. In this file, add in the file types or specific files you’d like to ignore, with line breaks for each. For a Mac user, a typical .gitignore would contain the following code:
._*
.DS_Store
Thumbs.db
Don’t forget to add and commit your .gitignore file to your repository!
Learning when and what to commit
Make sure to commit often, and as soon as you’ve added a small function or significant piece of code. The main thing is to commit frequently, so you can keep track of the changes you are making in a systematic way.
When writing commit messages remember to use the imperative “Add”, “Fix”, or “Change”. I find it helpful to imagine you are completing a sentence like, “This code will”...
Add all new files to themeFix broken button hover stateChange menu system markup
Things to remember:
- Don’t create a commit for every new line of code.
- Don’t commit only once, at the end of a project, when everything is done.
- Your code doesn’t need to be “done” to commit.
- You should always commit when you add a new function, feature, or component.
- Think of your code in modular pieces, and your commits are even smaller pieces of that. If you were in a time machine, what places in your code would you want to be able to step back to. If you were playing a videogame, where do you want to save your progress before trying to beat the big boss?
"If you were in a time machine, what places in your code would you want to be able to step back to. If you were playing a videogame, where do you want to save your progress before trying to beat the big boss?"
Get started using Git
Even if you’re a bit uncomfortable with the command line, you can choose to use GitHub Desktop and be able to do most of the things you can do with typed commands. The great thing about Git is that you don’t need to know all its capabilities to start using it, and for it to be useful.
Further reading:
- Super simple guide to Git
- Git basics
- Command line basics
- In depth Git documentation and video tutorials
Chapter Two: States, SSH Keys, and Reverting Commits
In chapter one of this guide, I introduced you to how to use Git with Shopify themes. I explained the importance of Git, how to install it, and covered the process of making your first commit.
This chapter will focus on more Git concepts that help developers take advantage of its power. We’ll take a look at states, SSH keys, and how to revert a commit. Because Git has so many powerful features, I’ve chosen to dive into the ones I think most beginners will use, and need to understand in order to successfully work with teams.
You might also like: The 10 Best Markdown Editors.
States

Many other version control systems just track changes to files over time. The key difference with Git is that it tracks data more like a series of snapshots of the entire file system.
With Git, each commit is like saving the state of your project — think of it like a snapshot of what all your files look like at that given moment. This becomes particularly impactful when you take advantage of branching, which we’ll talk about later.
The way Git tracks these changes is by assigning a special 40-character string called a SHA-1 hash. For each snapshot or save point via commit with Git, there is a unique SHA-1 hash associated with it. It looks something like this:
50ea6db1ca231aeca198bedf249d91deccf74411
To see the SHA-1 hash for your commits, simply type the following into the terminal in the project directory you are tracking with Git already:
git log

You should see a list of commits, with their SHA-1 hash, author, date, and commit message. You can type q to exit the list of commits, which is opened inside a pager program in the command line (which makes the commits scrollable).
When using Git, it’s important to understand the difference between tracked and untracked files.
Tracked — Tracked files are those that were in your last commit or snapshot. Git is aware that they exist, and is following any changes that might be made to them.
Untracked — Untracked files are those that are not being tracked by Git. Often, these are new files that have been added, but we haven’t told Git that we want to track them. You can have Git track these files and set their state to staging by using git add <filename>.
You’ll always need to add new files for Git to track, before you can make a commit that includes those files being added to the repository.
There are three states in Git for tracked files. These include:
Modified — Modified files are those that have been modified, but not committed to your database yet (saved in Git history).
Staged — Staged files are modified files that you’ve marked in their current incarnation to go into your next commit.
Committed — Committed means that the data has already been stored in your local database (or already committed using git commit).

SSH keys
The next important thing to understand when using Git regularly is SSH keys.
So what is an SSH key? An SSH key serves as a means of identifying yourself to an SSH server, using something called public-key authentication. What this means is instead of having to type in a username and password each time we want to access a server (ie. GitHub), we can authenticate using a special key-pair. Essentially, what we’re doing is creating a way to login to a specific server, without using a password because that server will be able to identify your computer.
Let’s set up an SSH key with GitHub so there’s no need to type in our username and password each time we want to push changes we make locally.
1. Generate your RSA key pair
Generating an RSA key pair provides you with two long strings of characters: something called a public and a private key. What we then do is place the public key on any server (in this case it will be GitHub), and then unlock it by connecting to it with a client (our computer) that already has the private key.
ssh-keygen -t rsa -b 4096 -C "your_email@example.com"
Where the 4096 refers to a 4096 algorithm, which is recommended by GitHub when setting up SSH keys. Make sure to replace your_email@example.com with the email address you used to sign-up for GitHub, and that it matches the email you set Git to use globally on your computer.
2. Store keys and passphrase
Once you’ve typed in the previous command, you’ll be asked where you want to store the keys.
Enter file in which to save the key (/Users/tiffanytse/.ssh/id_rsa):
Next, you’ll be asked if you want to set a passphrase. For extra security you can use a passphrase, but I would say most people don’t bother to enter one, just because you’ll need to type it every time you use your key pair. To skip entering a passphrase, just hit return on your keyboard when it prompts you for one.
Enter passphrase (empty for no passphrase):
Your public and private key will live wherever you’ve chosen to save them on your computer. Usually this is in a hidden .ssh folder as id_rsa.pub for your public key, and id_rsa for your private one.
3. Copy your SSH public key
From your terminal, you should be able to type the following to copy your public SSH key to the clipboard:
pbcopy < ~/.ssh/id_rsa.pub
The ~ should take you to the root folder of your user (when I generated my SSH key on a Mac, you saw it was saved inside Users/tiffanytse — the ~ brings me to the same directory).
4. Add your SSH public key to GitHub
Then go to GitHub, and click onyour profile photo> Settings > SSH and GPG keys > New SSH key / Add SSH key.

In the Title field, add a description that will help you identify which machine the new key is for. For example, if you're using a work Macbook Pro, you might call this key "Work MacBook Pro."
Then, paste your key into the Key field using cmd v on a Mac or ctrl v on a PC, and click Add SSH key. If you’re prompted to, confirm your GitHub password and you’re all set!
Now you should be able to push commits from your local machine to GitHub, without having to type your GitHub username and GitHub password every time! Just make sure to start a new terminal or GitBash session for it to take effect.
GitHub Desktop
If you’re using GitHub Desktop, there’s no need to setup your SSH key. This is because logging into the app with your GitHub account with authenticate you automatically.
Revert commits and stepping back in time
So what happens if you make a mistake and need to go back in time? Well we can easily revert a commit, or set of commits, and step back in time. The reason why it’s helpful to commit early and often, is if you do make a mistake, it’s a lot easier to revert to a specific point in time. It’s like stepping back to a previous version, but at a much more granular level. And this is also why descriptive commit messages should always be used; so you know what changed between commits if you do need to go back in time.
Revert undoes the changes that the related commit hashes introduce (for which you specify in your revert), and then you record new commits that keep track of those changes. In other words, when you perform a revert, you never overwrite your history, you are simply changing your code back to a snapshot in your history, then making a new commit. Your working history is preserved, with bad commits intact, in case you do need them later.
Note: To perform a git revert you need to have a clean working tree. This means there cannot be any modifications to your code that need to be committed or staged.
Scenario: I made a few commits, and broke my theme, and now I want to go back to three commits prior.
1. Run git log.
First, you’ll want to run git log and copy the commit hash for the commit you want to step back to. Type:
git log
And then copy the appropriate commit hash for the commit you want to step back to (the 40 character alpha-numeric string associated with the specific commit).
2. Perform git revert.
Next run the following command, replacing the commit hash with the one you’ve already copied.
git revert --no-commit b407bcdc17f34cd4f4d5cc792bae4ef5e2819462..HEAD
In the example above, the --no-commit flag allows for you to git revert all the commits at once without being prompted for a message for each commit in the range. This removes a bit of clutter from your history with potentially unnecessary new commits if you’ve selected more than one commit to revert. The b407bcdc17f34cd4f4d5cc792bae4ef5e2819462..HEAD part of this command tells Git that you want to step back to a specific hash from the most up-to-date position (which is the HEAD).
There are several other ways you can select which commits to revert. Plus you can still pass the --no-commit flag, using these different options. For example:
To create three separate revert commits:
git revert a867b4af 25eee4ca 0766c053
Git will take ranges, to revert the last two commits:
git revert HEAD~2..HEAD
To revert a range of commits using just commit hashes:
git revert a867b4af..0766c053
3. Make a commit for your revert.
To make sure we keep track of our changes, we need to make a commit to our repository that records the revert we just performed. Run the following command to commit your revert changes:
git commit -m “Revert changes that broke the thing”
Make sure to replace the commit message with something descriptive of what you reverted, what was broken in the code, or even as specific as the commit hashes you reverted.
It’s important to note that when searching online for git revert, you’ll probably find examples that show how to use reset and --hard to reset, erase history, or specific commits. I highly recommend not taking these approaches because you’re essentially sidestepping the entire point of Git when you erase your history.
4. Push your changes to GitHub
Once you’ve made the revert, you want to make sure you sync your changes with your remote repository on GitHub. Should anything ever happen to your laptop, or you need to access your code from another computer, having your changes synced with GitHub is imperative.
git push
Assuming you’ve setup your SSH keys already, and a remote for your repository, you can simply type the previous command, and watch your changes sync (with your reverts) to GitHub!
You might also like: A Beginner's Guide to Sass with Shopify — Part 1: Getting Started With Sass.
GitHub Desktop

If you’re using GitHub Desktop, simply click on the History tab of the left hand panel, and right click on the commit you wish to revert to. Select Revert this commit, and a new commit will be created reverting back to the one you specified.
You’re on your way to becoming a Git pro! 🚀
By using SSH keys, understanding file state, and how reverts work, you’re well on your way to becoming proficient with Git! Already you can probably see how much more accurate commit messages are rather than using the versioning dates from the code editor in the Shopify Admin.
Further reading:
- Great explanation of tracked, untracked, and the three states of files.
- SSH Keys and RSA Keys
- Reverting previous commits
- Official revert documentation
- Command line basics
- In depth Git documentation and video tutorials
Chapter Three: Branching, Pull Requests, Merge Conflicts and Workflow
In chapter one, I introduced you to how to use Git with Shopify themes. I explained the importance of Git, how to install it, and covered the process of making your first commit. In chapter two, we looked at states, I showed you how to create your own SSH key to use with GitHub, and how to revert commits.
In this chapter, we’ll cover Git branching, pull requests, and how to approach merge conflicts. We’ll also take a look at how to integrate Git into your theming workflow, and the different approaches one can take when doing so.
Branching
What truly makes Git powerful is the ability to branch and merge files and code together. Unlike other version control systems (VCS), instead of making a copy of a set of files, Git branching is described as essentially a lightweight pointer to a specific commit (or snapshot of a point in time).
The most common analogy for branching with Git is that of a tree 🌳 — go figure?!
The idea here is that your main trunk (master branch) is where the source of truth lives, this is the main codebase that all other branches build off from. Each branch created (see what I did there?) is a pointer to and built off of a specific place (commit) in that main trunk (master branch).

One of the most popular forms of Git workflow is the use of feature branches. Feature branches are created for every new type of functionality added to your project, and normally deleted after a feature branch is merged back into the main trunk (master branch). This is how we work at Shopify!
Essentially a branch is created from the main trunk (master branch), a new feature is added (perhaps with multiple commits), and then that code is merged back into the main trunk, and the process continues to grow the main trunk of the tree. The advantage is that you can experiment with new functionality in a separated, isolated sandbox, and quickly switch back and forth to the main trunk (master branch) when needed.
You might also like: Everything You Need to Know About Development Stores.
Someone once explained branching to me as the sort of “Save As” feature of Git. Essentially you are creating a starting point for new work based on an original copy. You play with multiple options while keeping the original safe.
When you create a new Git project using git init (see chapter one of this series) and then run git push -u origin master the default branch is master.
To see a list of branches for your repository, type the following command:
git branch
This will list all the existing branches in your tracked Git project, it’s akin to running git branch --list.
Creating a new feature branch
It’s important to understand that when you create a new branch, you’re just creating a labelled pointer to a specific commit or snapshot in time.
To create a new feature branch for an existing project you can run:
git branch fancy-feature
In this example, the previous command will create a new branch with the name fancy-feature.
This command only creates a new pointer — it does not select that branch to work on. To do that you need to run:
git checkout fancy-feature
Alternatively, you can do both of these actions in one command, and save on typing two separate commands by running:
git checkout -b fancy-feature
Where checkout switches you to the branch, and -b allows you to specify the new branch name fancy-feature, all at once.
Now make a change to a file and save. We’ll then commit that change to our newly created branch by running:
git commit -a -m “Change to file”
The -a flag commits all the changes in the working directory, and -m specifies a commit message to follow in the same command inside a pair of quotations. This is helpful if you are not familiar with navigating VIM, which opens up automatically within terminal to write a commit message if you don’t use the -m flag.
Note also, if you create a new file, you’ll have to use the git add command before you create a commit to add new files you wish to track.
GitHub Desktop
If you’re using GitHub Desktop, simply click on the Current Branch dropdown menu at the top of the main panel, and click on the New button. Name your new branch, and hit Create Branch. GitHub Desktop should switch you automatically to the newly created branch.

Pushing your branch to a remote repository
So far, the branch that we’ve created only lives on our local machine. We want to sync it to GitHub or another remote repository, so we can access it from any computer, and it’s backed up.
To push a branch to a remote repository make sure you’ve already set a remote by running:
git remote -v
The -v specifies verbose output, so that you can actually see what the remote URL is set to.
If no remote is set, this command will return no output. You should see the remote URL if you’ve followed the steps in chapter one of this guide:

To push the branch and changes to GitHub, we’ll run the following command:
git push -u origin feature-branch
The -u flag specifies the upstream for your newly created branch to the current remote (origin) and specifies what branch you wish to push to that remote. This only needs to be specified on the first push from your newly created branch, after which (as long as you’re on the branch you wish to push) you can type git push and Git will automatically push your changes to the corresponding branch on GitHub.
GitHub Desktop
If you’re using GitHub Desktop, simply click on the Publish Branch button at the top of the main panel. This will push your local branch and changes to the GitHub repository that was set up as the remote.

Creating a pull request
Now that we’ve created a change, and published that change on a feature branch. We can create what’s called a pull request via GitHub. A pull request is meant to propose and collaborate on changes in a repository. These changes are proposed from a branch, which ensures that the master branch (our tree trunk) only contains finished and approved work.
This is a way for us to merge the changes we’ve made in our branch with the code in the master branch (main tree trunk).
You can only open a pull request when there are differences between your branch and the branch you wish to merge into. Write access is also required to create a pull request. We automatically have write access because the repository we created is on our own GitHub account.
Once your branch has been pushed to GitHub you can go to your repository in GitHub, you should see an option to open a pull request on the main repository page.

By clicking on this button you start the process of creating a pull request. You can describe the feature changes that are being made in your pull request by typing a description into the write area. Once you’re ready you can click the Create a pull request button.
The next step is to request feedback from other team members or collaborators. One of the main goals in creating feature branches is to enable multiple developers to work with the same code base at the same time, and approve changes made to that code base. This is especially helpful when developing themes.

Once discussion and approval of your pull request takes place in GitHub, you can click on the Merge pull request button as long as there are no conflicts with the base branch (master). This will git merge your branch into master.
Deleting branches
Now that we’ve merged our pull request, it’s best practice to clean up. We can delete the merged branch on GitHub by clicking on the Delete branch button that follows merging a pull request.

Once deleted on our remote, we can also delete local branches. We first need to checkout the master branch (because you are probably still on the feature-branch you created) by running:
git checkout master
And then run:
git pull
The command git pull retrieves the newly updated version of master from your remote repository (GitHub). It’s an easy way to synchronize your local repository with upstream changes (changes on the GitHub version of your repository).
The command git pull essentially runs two different commands in the background, git fetch and git merge, grabbing the latest changes from your remote repository and then performing merge of those changes into your current local branch.

Then, by running the following command we can delete our no longer needed feature-branch from our local repository:
git branch -d feature-branch

Merge conflicts
Sometimes this process isn’t as smooth as we’d like it to be. This often happens if you have changed the same part of the same file differently in the two branches you’re attempting to merge together (via pull request or just locally by pulling down changes), and Git won’t be able to merge them cleanly.
This results in what’s called a merge conflict.
Merge conflicts are probably the number one reason why people give up on using Git collaboratively. They can be super intimidating, especially for someone new to Git. Even seasoned developers get frustrated and stressed out when having to deal with merge conflicts.
Resolving a merge conflict
To demonstrate, let’s say I created a pull request on a branch called conflict-branch that conflicts with the master branch.
This kind of conflict might occur if someone else created a pull request that merged into master before me, and changed the same line in the same file I’m trying to merge. Then when I go to create a pull request with my branch, it doesn’t contain the most up-to-date changes my colleague made with their pull request, which has been already merged into master.
You would see a warning in GitHub saying that I can’t automatically merge my pull request until a merge conflict is resolved.

To fix this locally, instead of doing it in browser (which can be pretty difficult when dealing with more complicated/multiple merge conflicts) we need to pull the changes from the master branch into our feature branch we are trying to merge. In this example, I’ve called this branch conflict-branch for clarity.
Pull the latest updates from master into your local branch by running (making sure you have already checked out the feature branch that has the conflict):
git pull origin master

We now have the merge conflict locally that we can resolve. I will open up the conflicting file to see what the conflict looks like and make the necessary changes.

I have an extension for Visual Studio Code called Git Lens that provides highlighting and extra Git related information, which is why you see a few options above the merge conflict as well as background color.
You might also like: The 20 Best Visual Studio Code Extensions for Front End Developers.
When trying to resolve a merge conflict, Git will inject standard conflict-resolution markers to the files that have conflicts, so you can open them manually and resolve those conflicts. These markers look like <<<<<<<, =======, and >>>>>>>.
The code that appears in the first block between line five and line nine (in the green), is the current change on my local branch. The code appearing in the second block, between line nine and line 11 (in the blue), is the code that’s merging into my local branch from master, which is the incoming change.
The problem that Git has is not knowing which bit of code you want to keep, so I need to manually change this file to include the code I wish to keep, remove the conflict markers, then finally commit the change and push it to GitHub.

Once the conflict has been resolved and a new commit is pushed, you should see a happy green button in your pull request.

Workflow
There are a lot of different ways you can work with Git and Shopify. Depending on your team and skillset, how you work with Git and in what capacity will change. To give you a better idea of how you can use Git in your workflow, I’ve included a few examples.
Feature branches
At Shopify, we use feature branches as a way to collaboratively work on repositories together. There are over 900 contributors to our core product Shopify, which lives in a single repository.
When developing themes internally, the Shopify Themes team uses Slate build as a starting point, and each new feature is created on a separate feature branch and eventually merged back into a master branch.
Each time a feature is ready to be merged into master a developer creates a pull request, and requests a thorough review by other developers for the change being made. Once approved by colleagues, that change is merged into the master branch code base. At Shopify, we also use the rebase command to help squash messy commit messages and simplify commit history, so the code changes are a bit easier to follow.

At Shopify, developers use issues on GitHub for tracking tasks, and things to be done within a project repository. We also make sure to reference issue numbers and close open issues in commits for tracking, as well as keeping a clear history of changes to a project.
GitFlow for theme development
I recently spoke with Anne Thomas, a lead developer at Out of the Sandbox, who did a great talk at FITC about Git and the company’s workflow. Out of the Sandbox builds themes for Shopify, and they currently maintain four active themes on the Shopify Theme Store.
They use workflow similar to the Git branching model called GitFlow, coined by Vincent Driessen. GitFlow defines a strict branching model designed around project releases, providing a strong framework for managing and maintaining larger projects.
GitFlow essentially breaks a repository up into several branches, each of which have a specific purpose. The master branch contains the initial release of a project, and is tagged as such in Git. Feature branches are used to create new features that are merged into a develop branch, which is based off of the master. When several features have been added to the develop branch and they are ready for release, a release branch is created off of develop.

The code in the release branch is deployed onto a suitable test environment, tested, and any problems can be fixed directly in the release branch. This is iterated on until the deploy > test > fix > redeploy > retest cycle is in a place, where it can be released to merchants.
When the release is finished, the release branch is merged into master and into develop too, to make sure that any changes made in the release branch aren’t accidentally lost in new development.
The master branch is used only to track released code. The only commits to master are merges from release branches and hotfix branches.
Out of the Sandbox uses a modified version of this process for theme development. They use a master, development, feature-branch, bug-fixes-*, and hotfix method, along with
QA and design review. This review is done directly on the feature-branch and then development is reviewed a final time before merging into master.
Deployment tools with Git tracking
Part of a development cycle is also deployment, and when building custom themes for clients, you need to deploy theme changes to a store. I’ve talked to many partners that have built their own deployment strategies using a variety of methods, but alternatively, you could use a deployment tool in combination with Git, like Beanstalk, to handle syncing to a production store (instead of manually uploading a theme or building a process yourself). Luckily, there’s a handy article on using Beanstalk with Git for Shopify theme development published on this blog.
Git started!
Git is a robust subject to cover in just three blog posts, and even after using Git for many years there are always new magical commands that I learn every few months. What’s important is to get started, because you can’t learn or practice Git without just doing it.
If you’re more comfortable using a desktop app or IDE integration, then use those over the command line. The hardest part of any new software is building it into your workflow. With Git however, when something goes wrong (as it always does with programming), you’ll be glad that you did! Git to the rescue!
Further reading:
Take a look at these articles on the concepts discussed above, as well as some additional resources for learning Git:
- A in depth guide to Git by Atlassian (it covers GitFlow, too!)
- GitFlow
- Official Git documentation
- Anne Thomas’ Slideshare deck from FITC
- Aha! Moments when learning Git (uses some good analogies for learning Git)
- Codecademy online course (free)
- Git cheatsheet by GitHub Education
Is it your first time using Git? Tell us what you want to learn more about in the comments below!
