

Shopify's Liquid templating language is an ever-evolving framework, and as the requirements of merchants change, new additions to Liquid are released. In some cases, a new feature like Product Media will require a new set of specific Liquid elements. But, Liquid objects are also iteratively introduced for smaller changes that improve the reliability of Shopify storefronts.
An example of this process would be the routes and page_image global objects which are two recent additions to Liquid that make it easier for you as a developer to create reliable themes for your clients. By keeping your custom themes up to date with the new Liquid releases, you can ensure that your clients have the most robust themes, and are set up for success.
In this article, we'll look at why the routes and page_image objects were introduced, and demonstrate how they can be implemented on your custom theme builds. We'll also explore the positive benefits of using these objects, both from a merchant perspective, but also for optimizing your own workflow as a theme developer.
Improving link reliability with the routes object
Using hardcoded URLs to specify the destination of a hyperlink imposes a limit of just one static URL. As a result, if there are changes to URL formats or structures, there may not be support for new features and functionality on links that reference a hardcoded link.
To allow for changes to how URLs are formatted or structured, we've introduced the new Liquid global object routes, which generates variables for specific paths on Shopify stores that can be used instead of hardcoded links.
The immediate benefit of using this global object in your custom themes is that it will allow your clients to support multiple languages in their stores. The reason for this is because the routes object will output a dynamic URL based on what language, or locale a buyer is viewing the store with.
You might also like: How to Optimize Your Clients’ Themes to Sell Digital Products.
For example, if a buyer was viewing the store using a French (fr) locale, the {{ routes.cart_url }} property would be outputted as mystore.com/fr/cart. When a buyer is viewing the store using the primary shop locale, the {{ routes.cart_url }} property would be outputted as mystore.com/cart.
Just to note here that these locales are different to the locale files contained within a theme’s /locale directory, and are published from the API to automatically create URL paths. For more information on this, read our developer documentation on how to support multiple languages in themes.

Learning Liquid: Getting Started with Shopify Theming
Get this free guide and learn practical tips, tricks, and techniques to start modifying, developing, and building Shopify themes.
By entering your email - we’ll also send you marketing emails related to Shopify. You can unsubscribe anytime. Note: the guide won't be delivered to role-based emails, like info@, developer@, etc.
Using the routes object
The routes object has 14 different properties for connecting with various pages on a Shopify storefront. These include routes.root_url that returns the base URL of a store, and routes.collections_url that returns the URL for the collections page. The full list of all routes properties can be found in our developer docs.
A helpful example to see how the routes object can be implemented is to examine how it's used on the Debut theme's cart section. On this cart section, we can find three instances where the routes object is used for different purposes.
Instance #1
The first function that the route object is utilized for is to create a "Continue Shopping" link above the cart summary, that directs to the catalog page, which is a page that lists all of the products in a shop. We can see in the example below, that the href attribute of the link doesn't specify a URL or path, but instead specifies a Liquid object.
This will output to:
As previously mentioned, the "Continue Shopping" text could appear in different languages, depending on how the store is managing locales. This example shows a simple use case for the routes Liquid object instead of a hardcoded URL on a link element.
Instance #2
The second instance of a routes object on the cart page of Debut is within the form element, where the action attribute defines what URL handles the cart form data once it is submitted. This looks like:
In this case the action attribute specifies the URL of a form processor. Previously, we would have used /cart to indicate how the information in the form would be sent and processed, but now we can use {{ routes.cart_url }} to define this path.
This will output to:
This demonstrates how the routes object has applications beyond simply generating a URL for a hyperlink.
Instance #3
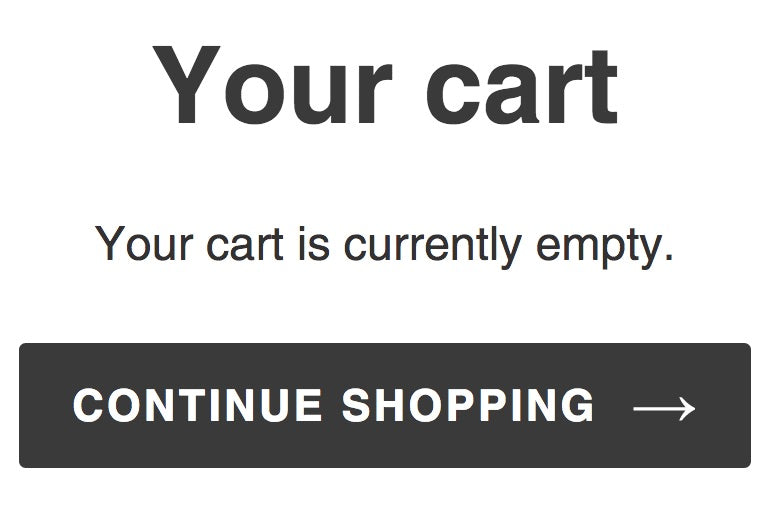
Finally, the routes object is used to create a link for a “Continue Shopping” button that appears when a cart is empty. The structure of this is similar to the first "Continue Shopping" link we saw, but utilizes a different property to direct buyers to the homepage of the store. It looks like:
This outputs to:
By using the different routes properties instead of hardcoded links, you can futureproof the themes that you work on and ensure that they support any changes made to the URL format.
You might also like: Build Forms on Shopify: How to Use Liquid to Build Robust Forms for Shopify Themes.
Optimizing social sharing with the page_image object
Ensuring that the most appropriate image appears when a merchant shares their store pages is crucial when you consider how much store traffic can come from Facebook, Twitter, Instagram, and other social media sites. This is why we have given better options to merchants to decide which image appears when their Shopify store page is shared on social media.
We have implemented a new feature for adding a social sharing image preview which is decoupled from a theme’s settings, which allows merchants to define which image they would like to have appear in posted links. The image can be defined from the store admin, at Online store > Preferences.
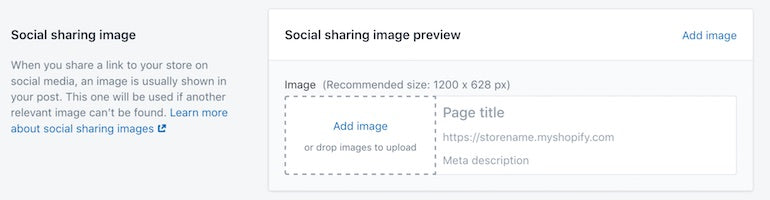
Once an image is uploaded here, it's path name is outputted on themes using the new page_image global object. This page_image object can then be used to specify the og:image within your custom themes' meta tags, which are identified by social media sites as the image that should be displayed.
How to use the page_image object on your custom theme
Until the launch of the admin-based social sharing image feature, it would be common practice to create a theme setting with an image picker that would define the social sharing image. Once a merchant had uploaded an image via this theme setting, it could be referenced as a settings variable within the meta properties of a theme, and recognised as an og:image by social media sites.
However, if a merchant switches themes, they risk losing their social sharing image, since it's tied directly to the theme. A more reliable approach is to store the social sharing image as a resource that is associated with the store, and accessed using the page_image global Liquid object.
Implementing this approach on a custom theme requires editing the theme’s og:image meta property, to ensure that the content attribute is specifying the page_image object. This will allow you to automatically output a path to an image stored on the admin, and define this as the og:image property. Here are the steps to follow.
1. Identify where the theme's social meta tags are located
The first step is to identify where the theme's social meta tags are located. The social meta tags are usually contained within a snippet file, and searching for "og:image" within your theme will allow you to find where you need to update your theme.
If your custom theme uses a theme setting approach to define the og:image, it's likely that you'll see a meta property that specifies a settings object for the og:image:
<meta property="og:image" content="http:{{ settings.share_image | img_url: '1200x1200' }}">
2. Pull an image associated with the store instead
The settings.share_image here refers to a setting that's set up with an ID of share_image that would be found in the theme’s settings_schema.json file. To pull an image that's associated with the store instead, we can simply replace settings.share_image with page_image:
<meta property="og:image" content="http:{{ page_image | img_url: '1200x1200' }}">
Now, when an image has been uploaded to the social sharing image area on the store admin, the meta property element will output to something like:
<meta property="og:image" content="https://cdn.shopify.com/s/files/1/0416/1054/3253/files/liams-logo.png?v=1594876636" />
3. Remove the previous theme settings
Finally, the theme settings that previously allowed merchants to pick a social share image can be removed from the settings_schema.json file to avoid any confusion for your clients who see this redundant setting.
Testing your og:image
Once you've added the page_image object to your custom theme, you can test that the og:image is being registered correctly with social media sites by using the Facebook Sharing Debugger. This tool allows you to enter a URL and check if the necessary metatags and og tags are set up correctly, as well as preview how the link will appear on Facebook.
To test out your theme's new og:image configuration you can navigate to Online store > Preferences > Social sharing image and upload an image:
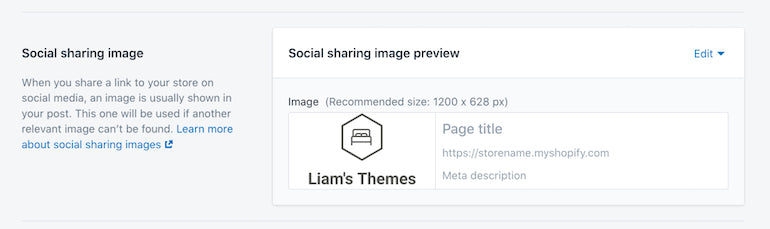
Once this is saved, you can enter the store URL into the Facebook debugger tool to scrape your store for metadata. A report will return information and warnings for any necessary properties that are missing. If the page_image object is set up correctly, you'll see the image you uploaded appear in the preview.

You might also like: The 20 Best Visual Studio Code Extensions for Front End Developers.
How to keep track of updates to Liquid objects
As new features become available to Shopify merchants, new updates will be made to Liquid that will allow you to service your clients, and improve your custom builds for themes. You can keep track of these new additions to Liquid by subscribing to our developer changelog, and our What's New newsletter for partners.
By implementing these updates with Liquid objects, your clients can be assured that they have access to any new functionality, and the general workflow for you as a developer is optimized to be as straightforward as possible.
Build apps for Shopify merchants
Whether you want to build apps for the Shopify App Store, offer custom app development services, or are looking for ways to grow your user base, the Shopify Partner Program will set you up for success. Join for free and access educational resources, developer preview environments, and recurring revenue share opportunities.
Sign up