

No one likes refreshing their browser every time you make a change to HTML, CSS, and JS during development. It takes time, and time is something we all wish we had more of.
In this tutorial we will take you through integrating Prepros into a Theme Kit development workflow, step-by-step, so you no longer need to manually reload your browser to see changes. For this tutorial, we’ll use a few different tools: Theme Kit, the command line, a text editor of your choice, and Prepros.
Grow your business with the Shopify Partner Program
Whether you offer marketing, customization, or web design and development services, the Shopify Partner Program will set you up for success. Join for free and access revenue share opportunities, tools to grow your business, and a passionate commerce community.
Sign up1. Install and connect Theme Kit
Before we get into hooking up live reloading with Prepros, you’ll need to have already set up Theme Kit with the theme you will be working on. To do this you can follow the instructions provided through the Theme Kit tutorial. I’m going to cover two ways of using live reloading with Shopify Themes; with regular old CSS files, and with Sass (SCSS) compilation.
Run theme watch
The final step with Theme Kit is to run the theme watch command. This ensures that the changes you make directly to a CSS file, whether through Prepros SCSS compilation or direct editing, are tracked and then synced to Shopify’s servers and your store.
2. Link your styles to theme.liquid
Using CSS in an existing theme
To customize an existing theme, you’ll need to either add in a new stylesheet or amend an existing one. For small tweaks to the existing theme, I suggest adding an additional stylesheet for your changes, or appending changes to the CSS at the bottom of the original CSS file.
To add an additional custom CSS file, simply go into the layout directory, and locate the theme.liquid file. In the <head> of your markup, add in the following code, after the original stylesheet:
{{ 'custom.css' | asset_url | stylesheet_tag }}In the example above, custom.css is the name of the new CSS file you wish to link into your existing theme.
Setting up brand new SCSS files and directories in a theme
For those already familiar with SCSS, this should make some sense. If you’ve never set up a SCSS project before you might want to learn about SCSS first.
In the case where you want to set up your own SCSS structure for a theme with live reloading, I suggest using a similar approach to how we build themes at Shopify. We use a combination of SMACSS guidelines, and BEM CSS naming conventions. If you’re unfamiliar with these concepts, I urge to you read more about them; they are great best practices for building scalable systems.
When setting up the SCSS folder structure (the example below is just showing styles), it might look something like this:
|-assets
  |-theme.css // this is the final compiled CSS consumed by your theme template
|-styles
  |-global
  |-modules
  |-settings
  |-tools
  |-vendor
  |-theme.scss // this file compiles into assets/theme.css
Where styles/theme.scss compiles to assets/theme.css.

You can place SCSS partials in the subdirectories of styles/, and @import all the partials into theme.scss. Using the @import directive follows a basic SCSS project setup, so that you can easily see and control the order of all modular styles in a project.
For this tutorial, I’ve created a _header.scss partial inside the modules directory, and then used an @import statement in my theme.scss, to link everything together.
We can then attach the styles by linking to theme.css inside our theme.liquid file, in the <head>:
{{ 'theme.css' | asset_url | stylesheet_tag }}
Importing an existing stylesheet into your SCSS structure
Additionally, you might want to import an existing stylesheet into your fancy new SCSS folder structure. You can do this provided that the existing file doesn’t include any Liquid objects. Prepros can’t compile Liquid, thus the compiler will error-out if you try to use a file containing Liquid objects with a .liquid extension.

If the stylesheet doesn’t have any Liquid objects, you can simply copy the stylesheet file into vendor/, and rename into a partial with a preceding _, such as _name-of-file.scss. Then @import the stylesheet into the top of theme.scss.
Note: when importing partials, there’s no need to include the _ in your @import statement.
Your styles folder is ignored automatically
In Shopify Themes, any additional top level directories are ignored by both Theme Kit and Shopify servers. Even if you .zip the theme and upload it, you’ll find that the styles/ directory isn’t included.
This is totally fine — just note that you should make sure to save the whole theme, with all the working files (ie. your styles/ directory) on Github, or some other form of version control.
3. Link Prepros to your development store
Now that we’ve figured out which files we want to edit (CSS or SCSS), and set those up, we can now dig into Prepros!
Add your theme as a project
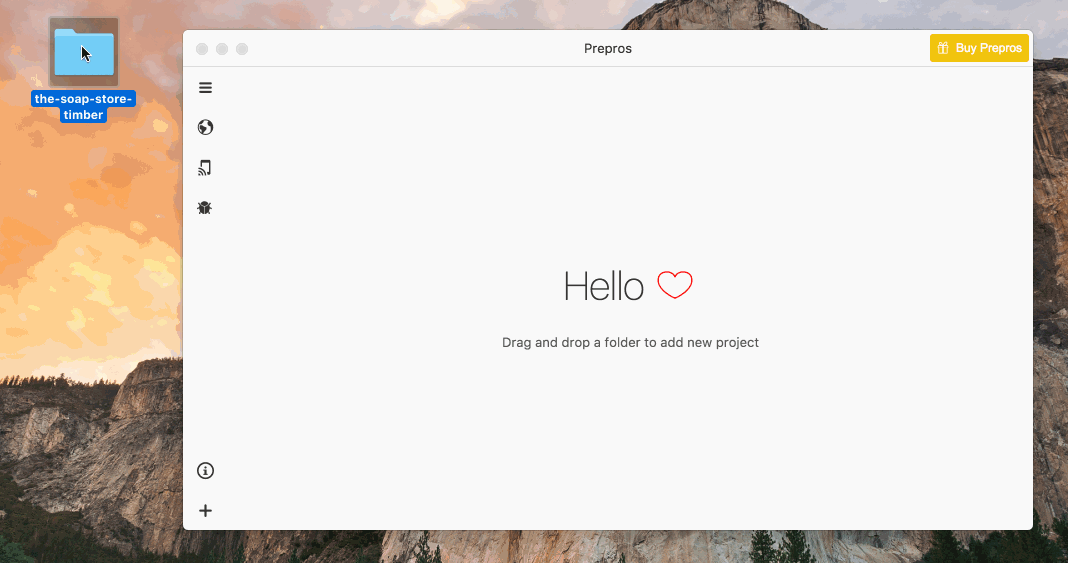
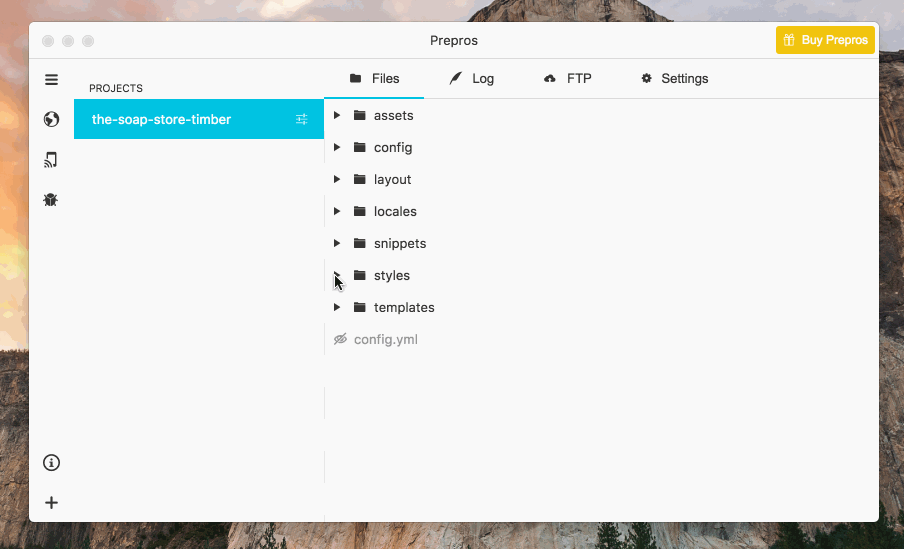
First, add your theme as a project to Prepros, by simply dragging the entire directory into the Prepros app. Alternatively, you can click on the + at the bottom left of the Prepros app, to add a project.
Prepros will create a prepros.config file in your project directory. This file contains the configuration settings for your project, such as where certain assets get compiled, whether you’ve enabled various settings, and so on. If you’re using Git, you may want to add a rule to your .gitignore, so that you don’t track or commit changes for your Prepros configuration (unless you want to).
Choose which files to watch, and what you want to compile where
By default, Prepros will be watching for changes to any files inside your project.If you just want to get live reloading working with your CSS file, you don’t need to do much more configuration.
However, if you’ve set up the SCSS folder structure outlined above, you’ll want to make sure that Prepros knows where to output the compiled styles/theme.scss file.
To change where the theme.scss file gets output, simply click on the file you want to change the output path for, and then select the directory you wish it to output to. By default, it will be in the same directory, but for building Shopify Themes we want it to output into the assets/ directory.
Watching Liquid files
Additionally, consider adding .liquid files to the list of file types Prepros will watch. They aren’t watched by default, since Prepros doesn’t compile Liquid. However, because Shopify will render the .liquid files appropriately, we simply need to trigger a live reload when there’s a change to a Liquid file.

To add .liquid files to the watch list, right click on any .liquid file, and select Watch All .liquid Files.
You might also like: An Overview of Liquid: Shopify's Templating Language.
Link live preview to your store url
The next step is to set the url for the live preview of your store. This is what links Prepros with your live Shopify store, and gets the live reloading to work. You’ll need to do this if you want to use live reloading with CSS or SCSS.
To do this, go to Settings > Live Preview and set Custom Server. Now, simply fill in the Server Url with your myshopify store url.
Set a delay for live reloading
Finally, you’ll need to set a delay in Prepros for the live reloading. The reason for the delay is to allow Theme Kit the time it needs to notice a change, and sync the changes with Shopify’s servers.

In Settings > Live Reload you have the option to set a delay. I’ve found that when using SCSS, the delay needs to be longer than if you’re reloading directly from changes in the CSS file. The reason for this with SCSS, is that we need one extra step, the compilation of the SCSS files, so it takes a bit longer.
If you’re working directly in a CSS file, the delay can probably be around 1000ms. If you’re using SCSS compilation within Prepros, the delay should be at least 1500ms. If you find live reloading isn’t working, increase the delay, it’s most likely that the reload is happening before the updated CSS makes it to the Shopify servers.
5. Live preview and make a change! 🙌
Now that you’ve set up Live Preview, click on the ![]() icon to launch it in your default browser. This will be the tab or window that will automatically reload when a change is made to your theme.
icon to launch it in your default browser. This will be the tab or window that will automatically reload when a change is made to your theme.
What’s happening under the hood

So how is all this working together? Let me explain.
When you make a change in your text editor, let’s say in a SCSS partial like _header.scss, the theme.scss file that uses @import as a directive to import the partial, gets compiled by Prepros into theme.css. The compiled theme.css is then updated in the assets folder, again by Prepros.
Once Prepros is finished compiling, it does a live reload of your browser on the port that it has control over, and you see port in the url bar of the live preview provided by Prepros. But wait! We’ve set a delay, so this pauses the triggering of live reload for 1500ms.
Meanwhile, Theme Kit detects the change to the updated CSS file, and syncs it with the Shopify servers.
Our 1500ms delay is over now, and the updated CSS is on our Shopify store. Prepros triggers the live reload in the Live Preview, and voila! You have live reloading with Prepros and Theme Kit!
You’re on your way to faster development 🎉
That’s it! Live reloading should be working now. Simply make a style change or update a template, and wait for Prepros to live reload your browser for you.
Some limitations of Prepros with Shopify
Liquid objects can’t be rendered inside SCSS files with PreprosLike I mentioned before, because Prepros doesn’t compile Liquid we don’t have access to our theme’s settings object. So you won’t be able to do something like:
h2 {
  color: {{ settings.color_primary }}
}
From my explorations, the source maps in Prepros don’t seem to work consistently, so debugging can be a bit difficult, especially if you have a lot of files. But Prepros will still tell you when there are compilation errors in the log, with a file, or line number error message, all while you work. So I don’t think it’s a huge problem.

Additional benefits of Prepros
There are a ton of neat tools that come baked-in with Prepros—feel free to read the full list if you want to learn about them all. I want to mention a few that I think are the most useful for theme developers below:
File MinificationYou configure Prepros to automagically minify your compiled CSS for you, or set a minified version. This is awesome because it means that you can improve the performance of your site, simply by checking a box.
Prefix FreeHate writing prefixes? Turn on the Prefix Free option for compiled files, and never worry about which CSS properties need prefixes.
Sass, Less, and Stylus compilationShopify doesn’t natively support Less or Stylus, but with Prepros you can use your favorite CSS preprocessor. Simply replace the SCSS files with Less or Stylus extensions and syntax, Prepros will do the compilation, and Theme Kit will modify the updated compiled CSS file to Shopify’s servers.
What preprocessors do you use? Let us know in the comments below!
