

If you’re new to Shopify theme development, your first impression might be that every collection, page, blog post, and product page is controlled by a single template. Luckily this isn’t the case and there are, in fact, a number of ways you can apply different, or ‘alternate’, templates to these various page types.
With the introduction of sections to Shopify themes, creating alternative templates has become slightly more involved. Since most of a page’s content can be contained within a section file, we’ll need to create alternate sections and templates.
This Shopify tutorial will run you through the basics of creating your first alternate template, so you can start customizing your clients’ themes even further. I will also demonstrate how you can set up conditional Liquid logic to avoid using alternative templates and keep your themes nice and lean.
You might also like: How to Craft the Best 404 Pages for your Clients.
Creating an alternate template
If you’re using Slate, you can create a alternative template straight from your local text-editor when you run the slate watch command. Changes will be pushed to your theme when you save. Otherwise, you could use the Template Editor to make these changes from the admin.
First, we’ll need to open our theme’s templates folder and find the template we would like to edit. For example, if I have a range of shoes that I would like to add a custom message to, I would be creating an alternative for product.liquid.
Once we’ve identified which template we’re going to edit, we’ll need to copy all the code in this file. Depending on the theme you’re editing, you might notice that there’s very little code.
For example, the Slate scaffold theme has only one line: {% section 'product' %}. This is because most of the code that makes up the product page is stored in a section file, rather than a template file.
After we’ve copied this code, we can create a new file in our template folder using the following filename syntax: default_template_name.*.liquid. For example, an alternate product template could be called: product.shoes.liquid.
Now we can paste the code from your existing product.liquid template into your new file.
Currently this new template file contains a theme tag, eg: {% section 'product' %}, which loads the default product content. Since we want to load different content, we’ll need to change this theme tag and create a new corresponding section. For example, I would change {% section 'product' %} to {% section shoes-product %}.
Next, we’ll locate the product.liquid file within our sections folder, and copy all the code from this file. In this file we’ll find a lot more of the expected markdown for a product page, such as the product description object and add to cart button.
Within our sections folder, we’ll create a new file with the name we assigned on the alternative template file—for example: shoes-product.liquid—and paste the code from the original section into this new section.
Now we can make any changes which should apply to this particular set of products. For example, if there’s a specific line of text that should only be seen on shoes in the store, I could add this directly below the product description. This could look like:
Another practical application for an alternative template could be to hide the add to cart button, if your client has a set of products that are not for sale or only available for pre-order. Creating a ‘coming soon’ product template will allow your clients to showcase upcoming stock and measure interest for new products.
Once an alternate template exists, a new drop-down menu will appear in the relevant template option in the Shopify admin. This will allow you to select which template you would like applied to the collection, page, or product. Shopify will use the base template by default so you won’t need to change every existing item—just the ones you wish to be rendered with the new alternate template.

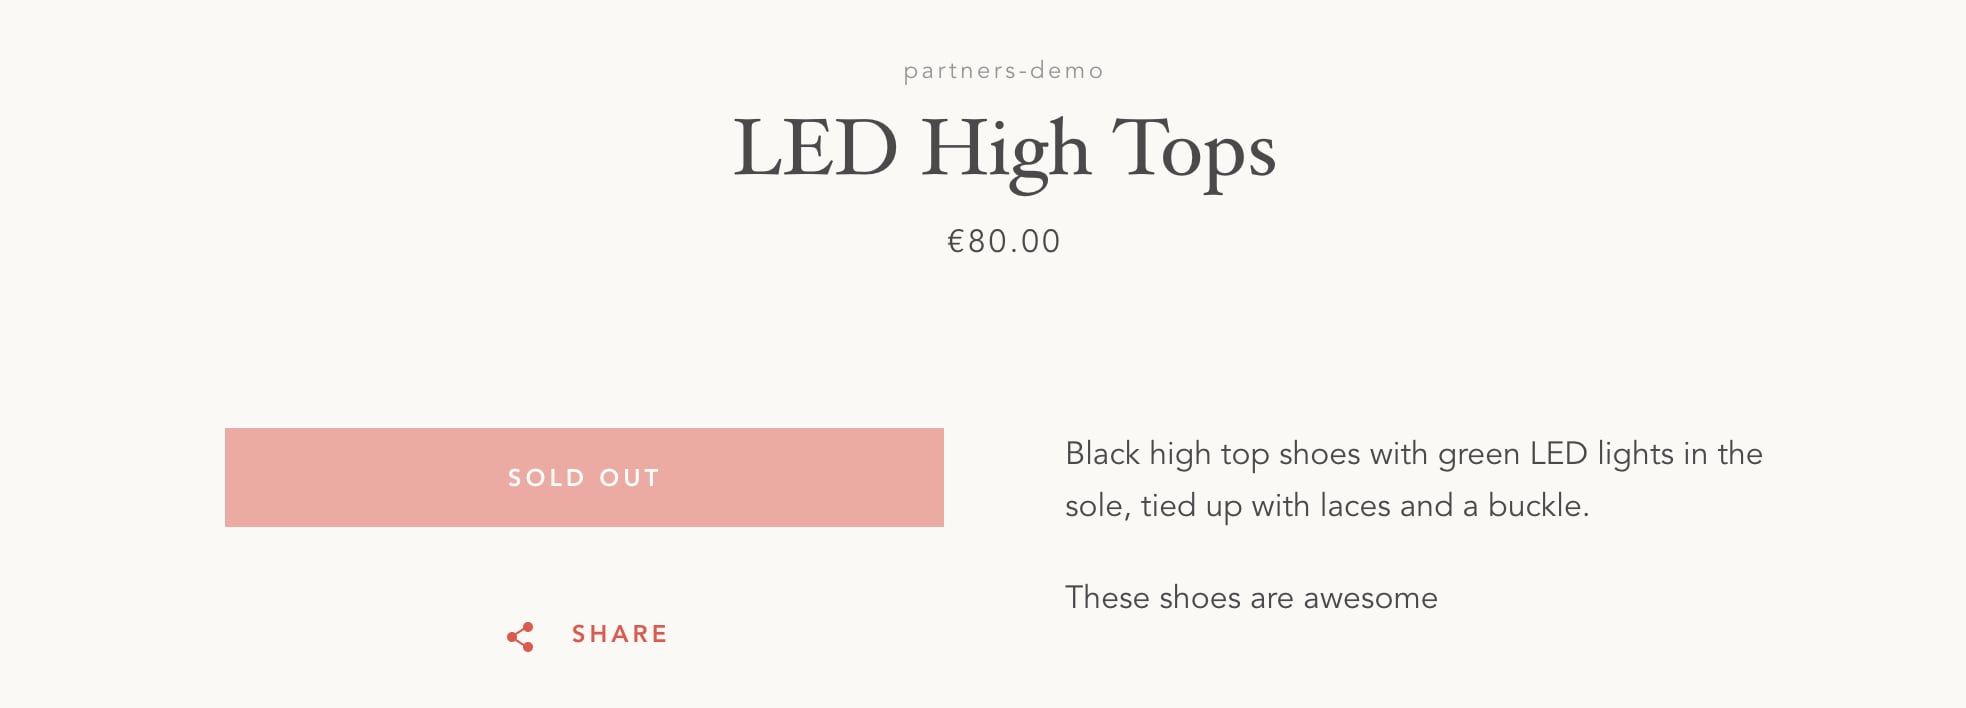
Once the template is applied to the product, the output would look like:
Following this method allows you to display custom messages, specialized images, and product-specific content when building sites for your clients.
You might also like: How to Create Your First Shopify Theme Section.
Shortcut with Liquid
If your clients have a complex arrangement of products that require custom content, you may find yourself creating a counterproductive amount of alternative templates. Having too many templates and sections will affect your workflow when making customizations, and it’s generally considered best practice to minimize the amount of code your client’s theme contains. Thankfully this can be solved with some clever uses of Liquid.
It’s possible to avoid making too many alternative templates by setting up conditional rules with control flow tags, to display content based on the attributes of a product or page. These control flow tags could be included in the main section of a page, bypassing the need to create additional sections or templates for a particular set of products.
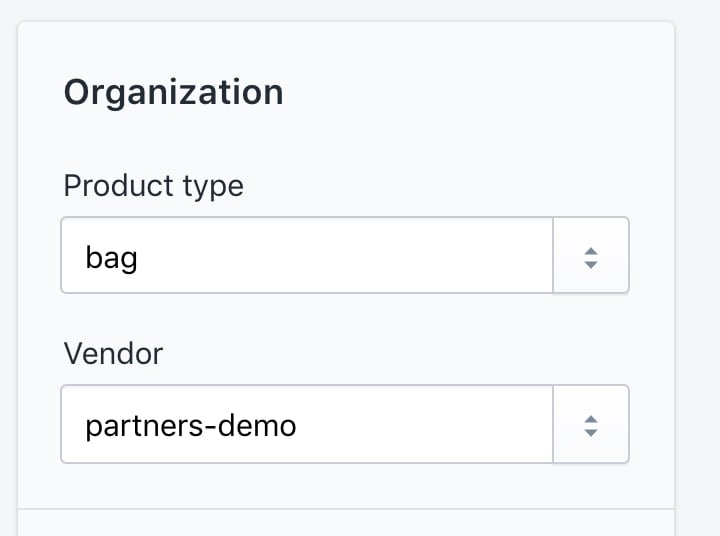
For example, if I wanted all the bags in my store to display a certain message, I could set up conditional rules based on the product type or product vendor. In this case, I could assign a product type of ‘bag’ to my product from the admin:
Now when I move to the product.liquid section, I can add an if statement to execute a block of code when a specified condition is true—in this case, if the product type is “bag”:
When I add this just below the product description, the output would look like:

This method is especially helpful if your clients have many distinct types of products which might require different size charts, or vendor-specific information.
Switch templates via the URL
Finally, there’s one other option for template selection that you have at your disposal. That is being able to select a particular template using the view querystring.
This will allow you to view a product or page on an alternative template by adding the templates name to the URL of the page. The format we would use here is ?view=alternative_template_name and this would be added to the end of the page URL.
Here's an example for you to review (NB: these links are for demo purposes only):
https://partner-demo-alt-templates.myshopify.com/products/led-high-tops?view=special
In this instance, Shopify will load a product template called: product.special.liquid.
If the requested template doesn't exist, Shopify will fail gracefully and use the default template, or the template specified in the admin. A really common use case for this technique is switching between a list and grid view within a product collection.
Grow your business with the Shopify Partner Program
Whether you offer marketing, customization, or web design and development services, the Shopify Partner Program will set you up for success. Join for free and access revenue share opportunities, tools to grow your business, and a passionate commerce community.
Sign upStart implementing this Shopify tutorial today
Alternate templates are a great example of the power of Shopify themes. By taking a few minutes to understand how to create them, apply them, and even switch them via a querystring, you start to expose the power of the platform and offer your clients, and their customers, even richer ecommerce experiences.
Have you used alternate templates? Share your experience in the comments below!
