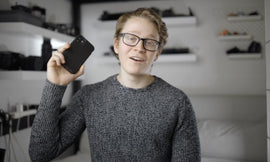
I recommend, before going out and buying an expensive camera, just try it with what you got on hand. Like your smartphone. I'm encouraging you not to buy a camera because the cost could exceed hiring a professional. And at this stage, when you're first starting out, money is tight. Now, I'm gonna show you how to set up your camera, starting with your smartphone. So let's start by reviewing our smartphone setup. We have this tripod which we discussed just a second ago.
I'm going to start by raising it up so that it's dead center on the product. And imagine the lens is up here, in the upper left hand corner. I'm going to try and center it on the product. As I kind of, when I start, the lens is going to be zoomed out completely and when it's close to the product, you may be able to tell that this is going to be a little bit distorted. So, this is because the lens is so small, it causes it to be a wide angle lens. You may have noticed this if you took a selfie and your nose looks really big.
It's the same kind of thing, but this product's nose is going to look really big if it's really close to the lens. So, how we're going to fix that is we're just going to pull this product back a little bit and the center of this lens is a little bit less distorted. And then to fix it, I'm going to zoom in, and so that looks a lot better. I'm going to go ahead and square this up so it's dead center. I'm really going to think about where I want this in the frame because I'm going to repeat this with my other products.
So I want you to really think about how this looks here. And then I'm going to square it up so that it's nice and level. Good, and that looks okay. I'm also going to rotate this product around until I get it to the angle that I really want it to. So, I want that Shopify sticker to be dead center. One thing I want to talk about is just the quality of the light that's coming in and you can tell that the left hand side is going to be a lot brighter than the right hand side of this product.
And that's something that we'll address later on how to control this slightly, But at first, I just want you to see what happens with this style of lighting and that's normal, that's okay. That's what we should expect to see. Let's talk about the exposure really quick. We really want this image to look right on the back of the camera as close as possible. To adjust the exposure we just push our finger to the screen and move it right and left. You can tell we can make it a little bit darker or a little bit brighter.
We don't want to go too bright, so on this one I'm just going to go just a little bit brighter. I'm going to go ahead and take the photo. You can tell where I tap, it focuses. Every app is going to be a little bit different as to how it controls the exposure and the focus. And since we're using the Lightroom app today, this is how we're gonna do it. So let's go ahead and take a look at what we've got.
But to start, you should know that every image that you photograph will require some sort of editing. In my 15 years of shooting, almost never has it come out of the camera looking just perfect. Throughout this course, we're going to use Adobe Lightroom to evaluate these images. There are two versions of Lightroom, Lightroom CC and Lightroom Classic. I recommend using classic for taking and evaluating photos for your business on your desktop computer.
It costs about 10 dollars USD a month. It comes with Photoshop and will really make your life a lot easier if you're shooting lots of photos. You can test it out with a free trial, too. Quite honestly, I don't recommend using Photoshop, as it's a very complex program, but Lightroom is really straightforward and most people can use it. Alternately you can use Microsoft Picture or Mac Preview, which come standard with your operating system to do some of the editing if you don't want to spend any money.
Shopify also has a built-in photo editor. My preference overall for ease of use and making these edits on multiple photos is Lightroom. Let's go ahead jump into Lightroom. I'll give you a little tour of how everything works and we'll get started. Let's start by talking about these different modules up top, so that's what these are up here. And we're primarily going to use the library module and the develop module.
The library module is where we keep our images in order, kind of like Finder, and it's got all our folders in there. And it really helps us stay organized and I'll talk about that in a second. And we also have the develop mode module and this is where we actually edit our photos and you'll see here on the right hand side. Here's what we can, where we'll be able to edit our photos. This other stuff like the map and the book and the slide show are really not used.
Sometimes you might use the print, but these other five modules are probably not going to be used. So let's go ahead jump back into the library. There's two sides to this. So the left hand side is where you kind of manage all your images here and you can see this is just, kind of, this catalog section is just every photo ever taken, all the sync photos and it just kind of creates these ones automatically so you don't need to really worry about that.
Down here in the folders section is where we're really going to spend a lot of our time. And you can see that we have a Google Pixel 2, so that's my phone and you can see all the images that have been synced in. So this is the latest image that we've taken. I also want you to notice that there's your archive folder. So after I'm done shooting, I can go ahead and just drag this folder into that archive, and if you have this archive in a folder like a dropbox, you can actually share this with the rest of your team and they can be able to see it.
On the right hand side, we have a histogram, which we'll talk about in a little bit. We have a quick develop, which we won't edit, and some of the metadata and this is kind of some interesting information. It shows the file name. It also shows the copyright status if that's important to you and the dimensions of the image. Let's go ahead and jump into the develop mode. So here's our image and now we can do, go ahead makes some edits on these images.
You can tell that Lightroom kind of comes with some what are called presets and you can actually purchase presets online, these kind of just give some interesting looks to the photos but we're not going to use that for this. On the right hand side, we're going to spend most of our time and to do, to develop your image and make some edits, you're going to start at the top and work your way down.
The first thing we're going to start with is the crop. So if I click this little square button, it's going to allow us to crop the image. I'm going to want to keep this relatively the same throughout my products. Now you can tell I can go and change the side. If I hold down shift, it changes it evenly, if I don't hold down shift, I can move it around like this. I'm gonna want to really center my product and press enter.
The next thing you want to do is just go into your basic and this is where we're going to spend most of our time. So I'm going to click the eyedropper and take a white balance and you can tell not a lot happened. And that's because our auto white balance on our camera was doing a good job and it made everything white. But, let's say if the image comes in super orange like that, I go ahead and take a white dropper and just neutralize it.
So, whatever we neutralize will turn it white. The next thing down is the exposure. I can adjust the exposure to make it brighter or lighter. I'm really looking to make sure, I don't want to blow anything out, which means make those whites too bright and then the contrast adds a little bit of shadow or darkness to either side. You tell how that's adjusting that a little bit and then the highlights will adjust just the whites and the shadows just part of the shadows.
So, we can kind of go through these and just kind of wiggle them around and kind of see what the results are and just kind of really dial it in. Once we get these set, we don't want to really make adjustments for future images because this lighting will be the same, and we want to keep it consistent. So with this first image, let's just really get it looking the way that we want and then shoot the rest of our products with this type of lighting adjustment, only making adjustments to the exposure if we need to.
These other types of areas, like the tone curve, the HSL, the split toning, we're not going to use in this course but just know that they're there and they're kind of fun to play with. Under the detail section, we really want to add a little bit of sharpening to our image. We don't want to go too far and you can kind of tell what happens if we go too far, it starts to kind of turn into this weird over-sharpened thing. This is noise reduction.
It will lower the noise. One thing I want you to notice about these images is when they're in their full screen mode like this, it looks okay, but if you zoom in, you start to see the downfall of shooting on a cell phone. It's very pixelated and you're not going to see this on some of our better quality cameras. So, if you're using a zoom function on your website, shooting with a cell phone might be an issue for you.
So, that's our overview of Lightroom. As you can see, we just touched upon the basics of how to edit some simple photos. We didn't really do a lot, but just know that this software is really robust and there's a lot you can do with it to help edit your photos and organize your photos for your business. Let's go ahead and jump on set and switch over to the point and shoot so we can see kind of the differences between shooting with a cell phone as opposed to shooting with a point and shoot camera.

