To master product photography, you need to understand how light works. This is especially true when it comes to photographing materials that don’t always play nicely with light like glass, metal, and jewelry.
Don’t settle for product images with light spots or reflections. With the proper lighting setup, you can easily take great photos of clear and colored glass, watches, sunglasses, metallic objects, and even jewelry.
“Proper” doesn’t have to mean expensive either, you can build a functional photo studio right in the comfort of your own home.
After you’ve figured out your home studio setup, check out these three inexpensive DIY lighting setups and choose one that’s right for your product.

Shopify Academy Course: Product Photography
Photographer Jeff Delacruz shares how you can create your own photo studio and take beautiful product photos for less than $50.
Enroll for free1. Box backlighting for glass
![]()
Backlighting is ideal for shooting clear or colored glass like bottles, wine glasses, or decorative glassware. It’s a simple technique that uses the translucency of glass to create a crystal clear appearance while still showing off a flattering shape.
For instance, this glass jar was shot with box backlighting:
![]()
Like the name suggests, in a backlit setup, you will be placing your light source directly behind your product. Position your light source so that the brightest part of your light shines through the glass, emphasizing the natural curves and outer lines of your product. Level your product and light source so that they’re on the same plane.
You can use continuous or strobe lighting, but you must diffuse your light. Ideally, you should have a lighting umbrella, but thin white fabric or layers of rolled paper can work in a pinch.
Learn more: Check out our list of 40 tools for DIY product photography.
Put your light diffuser between the light and your product, and then place a white foam board under and on both sides of your product. Place another foam board or more paper across the top.
The idea here is that soft light will be reflected back onto your product from all sides, wrapping around it evenly. The white spots and reflections that can sometimes show up in photos of glass result mostly from the bounce of harsh direct light, so you can avoid those unsightly blemishes by softening your light source and making use of indirect light.
For more defined outer edges, you can use black foam boards instead of white. This increases saturation and creates bolder outlines and colors. Watch how the outer lines of our vase below become darker as we add and adjust foam boards.
![]()
Here's a glass vase shot with no boards.
![]()
Here's the same vase shot with white boards.
![]()
Now, with black boards.
![]()
And, finally, with black boards moved in closer.
2. Side lighting for detail
![]()
Side lighting works well for detailed glassy products like sunglasses and watches. A box backlighting setup won’t work with more detailed products because it’s used, in part, to overexpose detail.
To side light a small product, you’re going to need a large table, a continuous or strobe light, an umbrella, foam boards, and a roll of seamless white paper. Position the light, diffused by an umbrella, directly to the left of your product.
In some instances, like when shooting a watch, you may need to move from direct side lighting to 45-degree side lighting in order to effectively illuminate the face without glare.
![]()
This watch, for example, was shot with 45-degree side lighting.
Your camera should be on a tripod and raised so that you are shooting slightly down at your product. Elevation in this setup will help to minimize reflections, but don’t go so high that you can’t get a flattering angle of your product.
Hang the white rolled paper so that it sweeps down and underneath your product, which you set on the table. “Sweeping” the paper means that it curves in such a way that there are no defined lines, eliminating shadows caused by creases. Connect the end of the sweep to the bottom of your camera lens to prevent foreground reflections.
Position two pieces of white foam board directly opposite to the light source, taped together to form a “V.” The “V” will funnel reflected light back onto your product. Check out the results below.

These sunglasses were shot with direct side lighting.
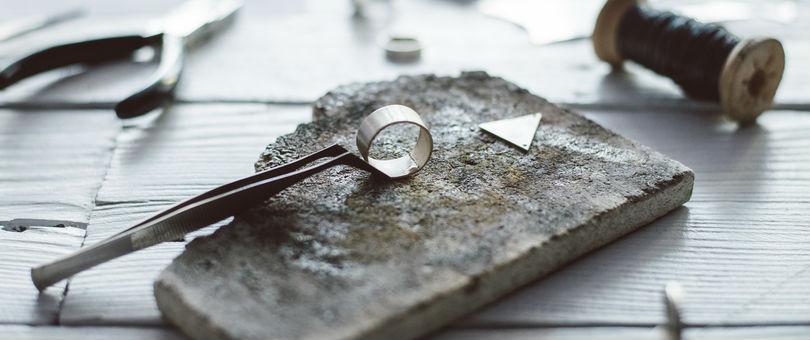
3. Double overhead lighting for metal
![]()
Metal is the most challenging surface to shoot because of how highly reflective it is. It’s difficult, there’s no denying - but it’s not impossible.
You can minimize or even eliminate reflections by using a double overhead lighting setup for shooting small metallic products like jewelry, pots and pans, and cutlery.
You’re going to need a table, two lights with umbrellas, and a white paper sweep. No foam board this time because we’ve got two lights and they’re going to be diffused by the umbrellas. With the other two setups it doesn’t particularly matter whether you use strobe or continuous lighting, but this time we recommend strobe lighting for increased control.
Position a light on each side of your product and diffuse each of them with umbrellas. Angle your lights down at the product and set each to the same power.
Position your camera on a tripod so that it faces the product and is angled slightly down. Sweep the white paper down under your product and fasten it to your camera lens to minimize fall off reflections.
If your product has been cleaned and prepped and you get the lighting right, you will end up with reflection-free photographs just like the one below.
![]()
A word on camera settings
![]()
Ensure your white balance, aperture, and ISO settings are optimized for your lighting setup.
Make sure your camera settings take full advantage of your lighting setup, or all your effort may go to waste. This isn’t the place for an in-depth tutorial on camera settings, but we’ll give you a quick rundown.
Adjust your white balance according to your light source, like the flash setting if you’re using a strobe. If you’re not sure, auto white balance is generally trustworthy. Choose a defined part of your object to focus on like a watch face or the outer edge of clear glassware.
Shoot in manual mode and set your aperture to at least f/11, but preferably higher (like f/16). Use the lowest ISO possible, like ISO 100, to capture the most detail.
Learn more about camera settings in our guide to DIY product photography.
For the backlit setup, you will probably need to slow your shutter speed down a couple stops below your light meter’s recommendation in order to overexpose the image. For side lighting and overhead lighting, you can follow your light meter’s recommendation.
Finish the job in post-production
![]()
If spots, smudges, or even one of those pesky reflections snuck its way into your photo, clean it up in post-production processing.
Clone out imperfections and check color accuracy. Heal defects you were unable to repair, like scratches or scuffs. Cut your product out from its background and place it on pure white to ensure consistency and minimize file size.
If you’re selling on marketplaces like eBay or Amazon, ensure your images are compliant or your listing may be removed.
Now get shooting
Don’t be afraid of reflections! Try out the recommended lighting setups and see if they work for you.
Do you know of any other good lighting setups for reflective objects? Are there other types of products you need lighting recommendations for? Let us know in the comments below!

About The Author
Thomas Kragelund is the CEO and founder of Pixelz, a leading product image solutions partner for internet retailers, bloggers, designers, photographers and webmasters worldwide. He has been working in ecommerce for the last 15 years. Sign up today and get 3 product images edited for free.