Ecommerce photography basics
If you do your own photo shoots and you are on a budget, you can still get good results by following these guidelines:
Camera
You don’t have to buy a fancy camera with a range of lenses to take good product images. If you have one, great! But if you don’t, start with what you have and scale your equipment as your store grows. You can take very professional and polished photos even with some of the latest smartphones.
Free Guide: DIY Product Photography
Learn how to take beautiful product photos on a budget with our free, comprehensive video guide.
Get our DIY Guide to Beautiful Product Photography delivered right to your inbox.
Almost there: please enter your email below to gain instant access.
We'll also send you updates on new educational guides and success stories from the Shopify newsletter. We hate SPAM and promise to keep your email address safe.
Neutral background
Choosing your background is vital because it will help you enormously in post-processing. You can invest in a white sweep, which is a backdrop that transitions seamlessly from the vertical to the horizontal plane. More simply, a wall that curves down into the floor. The idea here is to avoid the sharp edges of a corner where light bounces around. A brightly lit curve makes it difficult for the camera to capture depth and contours in the background. if that makes sense for your products and you’ll be using it often. Or, if you are on a budget, you can buy some craft paper or poster board and mount it over a table. As long your backdrop is white or light in color, you can get great results.

Lights
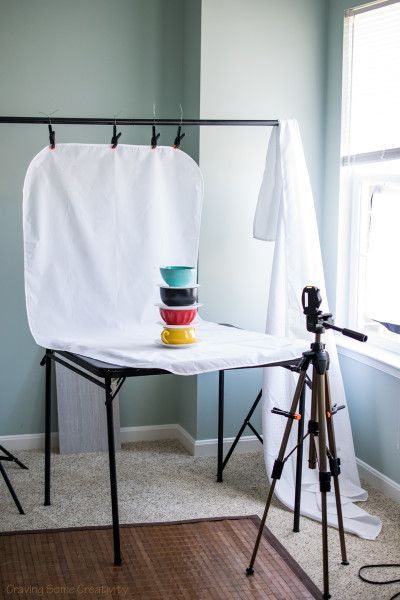
Lighting is essential to really define your images. Use natural light, if possible. Placing a table next to a large window with your sweep attached to the wall usually works well. This gives you a good amount of light with a soft shadow. If the shadow is too sharp, you can place a screen on the inside to soften it.
Avoid direct sunlight, though. Just like strong backlight, it’s too harsh and can create unsightly dark shadows. If you have to use artificial lights, two identical softbox setups can usually do the job, using one as your key light and the other as fill to soften any shadows.
Stabilization, focus, and consistency
Do not underestimate the importance of a tripod to minimize blur and keep the angle consistent across multiple products.
For those of you who are a bit more advanced and if your camera allows, set the lens to a small aperture, aka a high f/stop, and set a slow shutter speed. The higher the f/stop setting, the smaller the aperture. This will give you a wide depth of field that brings your entire product into focus to give it a crisp look. But your camera always needs to be well-fixed on your tripod or you will get blurry images.

Post-processing
Retouching is essential for polished professional photos to create a uniform look across your store. Often the lighting or the background are not perfect, and editing can go far in making up for that. Post-processing can be as simple as background removal or as complex as color correction, mannequin removal, and shadow additions which together create a more realistic look.
Learn more: The 25 Best Online Photo Editing Software (Free and Paid)
Understanding natural vs. artificial light
If there is one single defining factor in photography, it is light. If you understand the basic physics of light - how it travels, how angles work, and how to manage reflections - you will be able to get great product photos. Let’s take a look at the two main sources of light and how to make the best use of them.
Natural light
Natural light is the photographer's unicorn. It brings beautiful results, but it is often elusive and inconsistent to harness. When using natural light indoors, you should aim to shoot when the day is at its brightest so you have the most options to manipulate the light.
The golden hour, in particular, the time shortly before sunset or after sunrise, can give you good, soft lighting. You should employ reflectors and diffusers to manipulate natural light for optimum results. Be aware that you also may have to move your subject as the sun moves and lighting changes.
Studio light
Artificial lighting gives you significantly more control over the process, especially if you are shooting multiple products over several hours, which results in a reassuringly predictable consistency. However, studio lighting can be expensive and comes with a learning curve to master it to full efficiency. There are many different types of artificial lights, and you should be careful when investing in one. If you are just starting out, a set of two softbox lights for about $50 can usually work well.
Where it gets tricky is mastering the angling and defusing techniques that make for great studio photography. Defusing is used to soften the light by placing paper over the light source using light tents or softboxes. The other big element that affects your lighting is your backdrop, which for product photography is usually plain white or off-white. When you are shooting in a studio, you have to manipulate all these elements to set your scene for best results.

Shopify Academy Course: Product Photography
Photographer Jeff Delacruz shares how you can create your own photo studio and take beautiful product photos for less than $50.
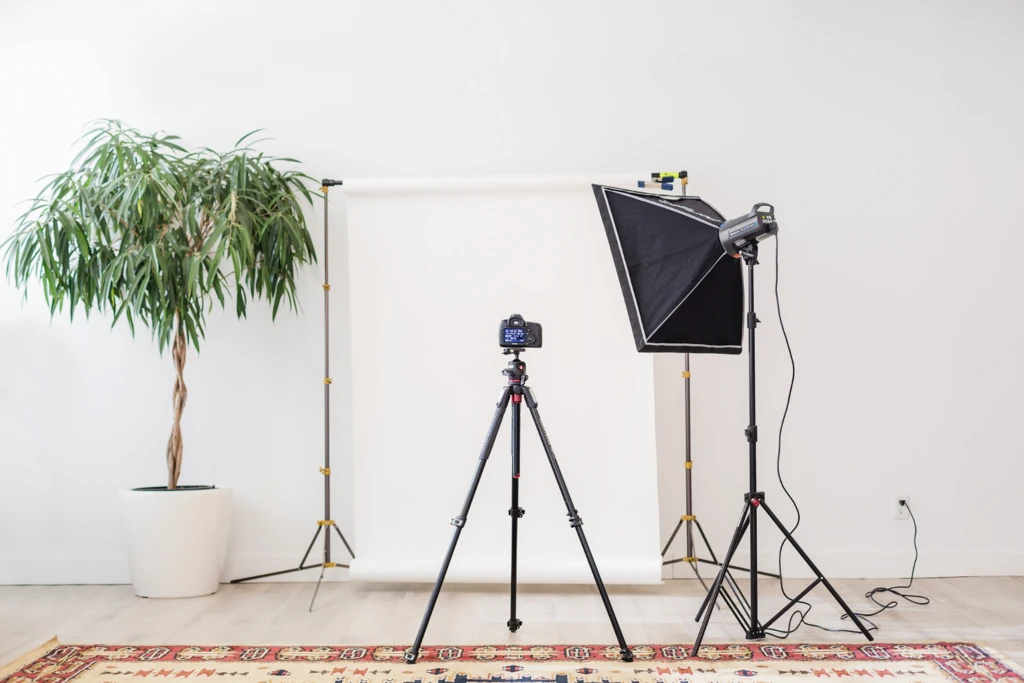
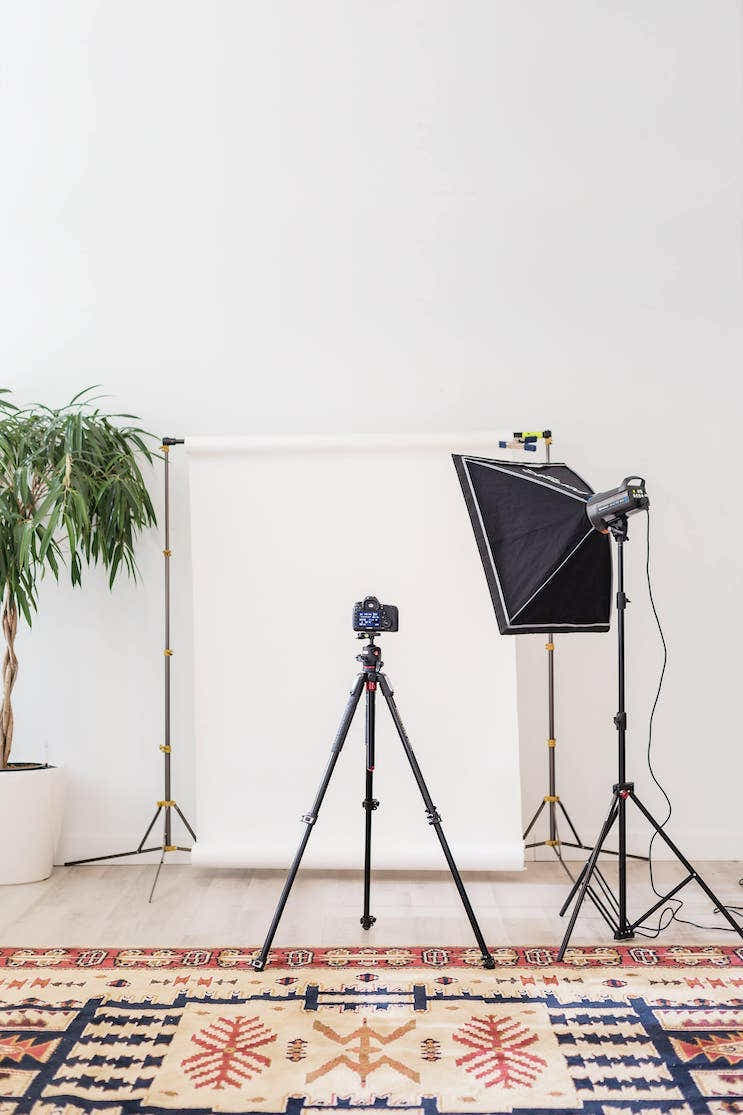
Enroll for freeCreating your studio setup
Lighting
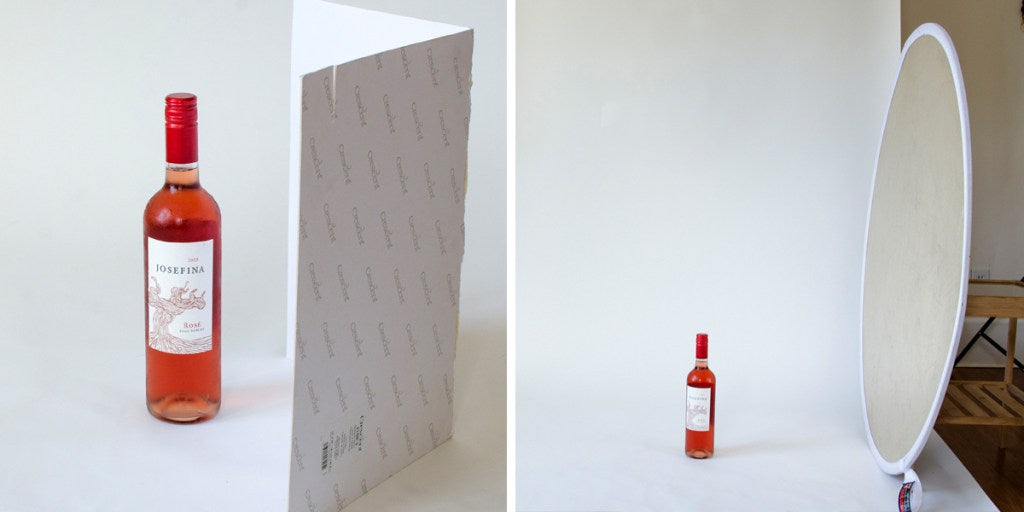
The most important part of your setup (and the most difficult to master) is your lighting. If you are using natural lighting, set up your sweep or your shooting table next to a large window. Cover the window with a white sheet if you need to soften the light. Have a reflector handy too, It can be plasterboard or any kind of white screen. Use the screen on the inside to reflect some light back if the shadows are too sharp.

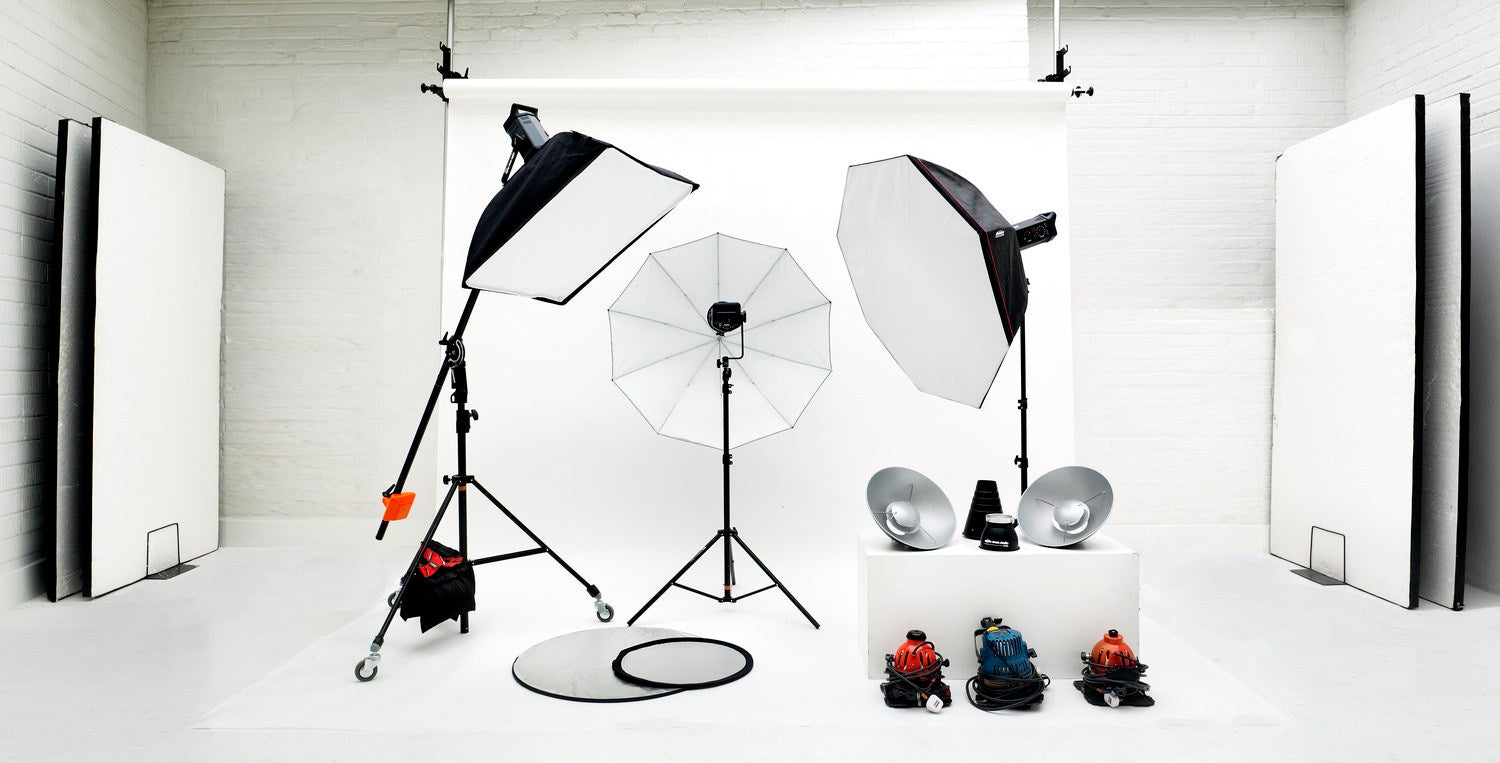
With artificial lights, you ideally need three softboxes (though two will also do). In the scenario with three, they function as your key light, your backlight, and your fill light. Your goal is to manipulate these lights by changing their angle and defusing them so you get evenly distributed soft shadows or no shadows at all. Your fill light is meant to soften the shadows from the key light, and your backlight gives your product depth and dimension.
The same principles apply for the scenario with the two softboxes, only here you have one less light to play with. One is your key light and the other is a backlight and fill at the same time. If you don’t have diffusers, you can use thin white craft paper to dull the harshness of the lights and get well-distributed soft shadows.
Backdrop
The other big part of your photography setup is your backdrop. For large objects like furniture or clothes on a mannequin, you will need a stand-mounted sweep. For smaller products, you can use a shooting table. Your backdrop should by-default be white because white reflects some of the light back and gives you an even, well-lit image. This, in turn, helps you greatly in post-processing, especially when you are removing the background.
Learn more: Models vs. Mannequins: Which Should You Use for Your Store?
Setting up the product
You need a stable shooting surface to place your product. For large products, that will be the ground over your sweep. For small products, you can use a shooting table or any other table you can mount or improvise a sweep on. You can have the table against a wall and tape the sweep on the wall, or you can build an improvised sweep stand by attaching two vertical planks to one side of any table.
Remember, your background should be white. And tweak your lights until you get them evenly distributed with little to show shadows. You can also move or turn your product around to see how shadow work before you fix it in position. Use tape, glue dots, fishing line or other help materials to fix your product in the right position.
Mastering photography angles
Camera angles refer to the angle of the camera relative to the product.

Eye-level. This is the most neutral shot and shows products the way we expect to see them in real life. It’s also the most common view we are all used to in most casual photography.
High angle. Here the camera is angled down towards the product and shows the item from above.
Low angle. This angle shows the product from below giving it a dominant, imposing impression.
Bird’s eye. This angle shows the product directly from above. It can be a good complementing shot to show a certain feature or add dramatic effect.
Slanted. This is when the camera is tilted to one side and the product is at an angle. This can create a dramatic effect or a sense of action, think running shoes
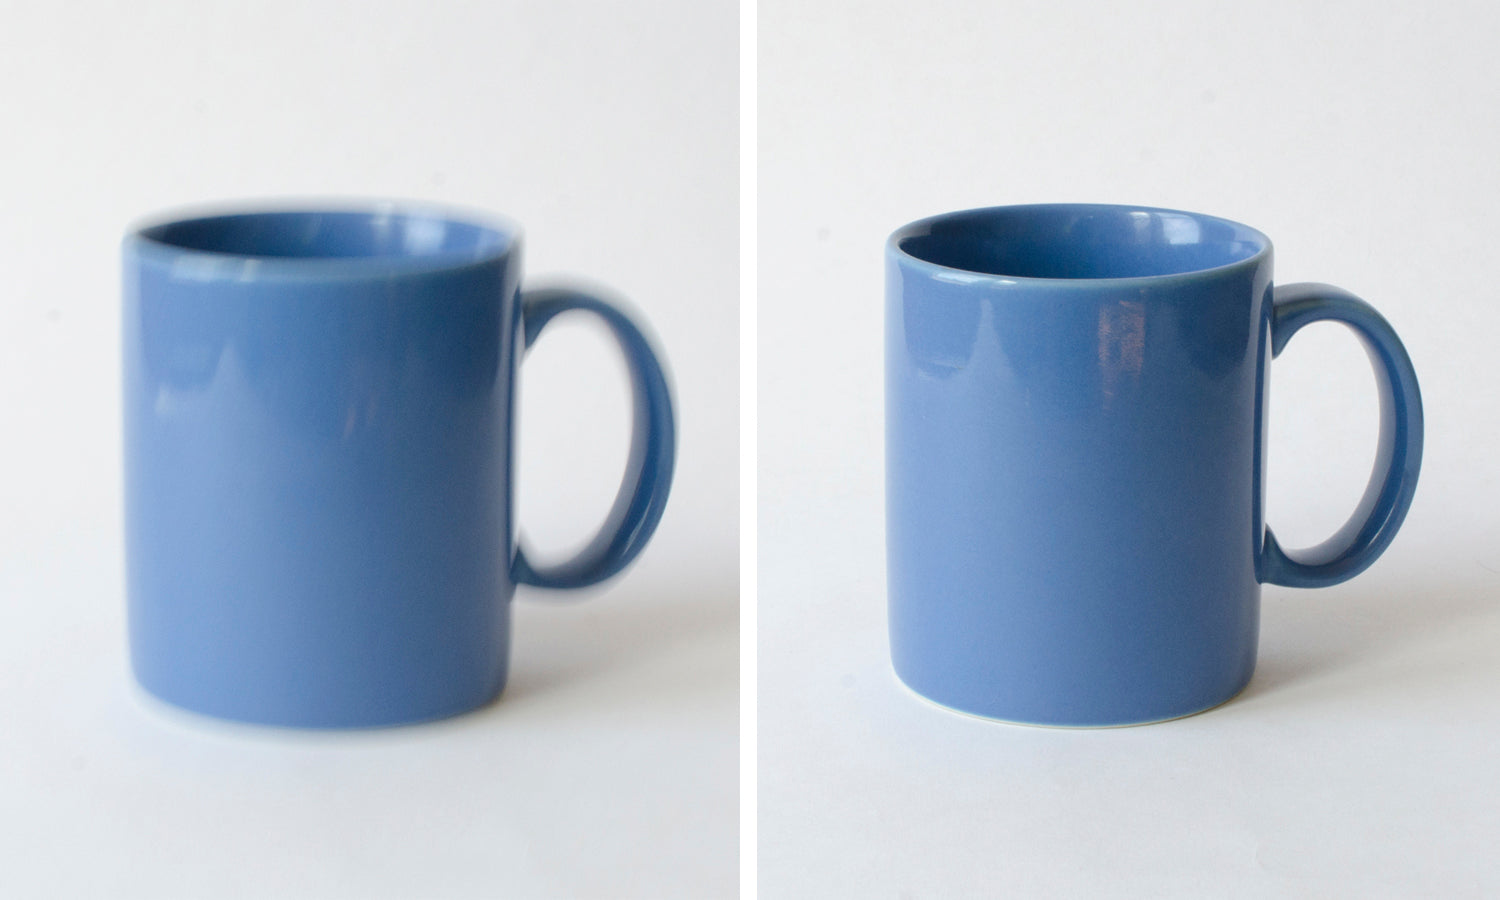
What kind and how many photos should you take
The rule of thumb here is to give your customers as many relevant perspectives as possible, showcasing your product’s features, uses, and intended environment.
Take enough photos to show the product from all angles
Your feature image should be at an eye-level angle with a frontal view of your product. Your supporting images, on average a dozen, depending on the type of product, features, and uses, should give the consumer every relevant perspective.
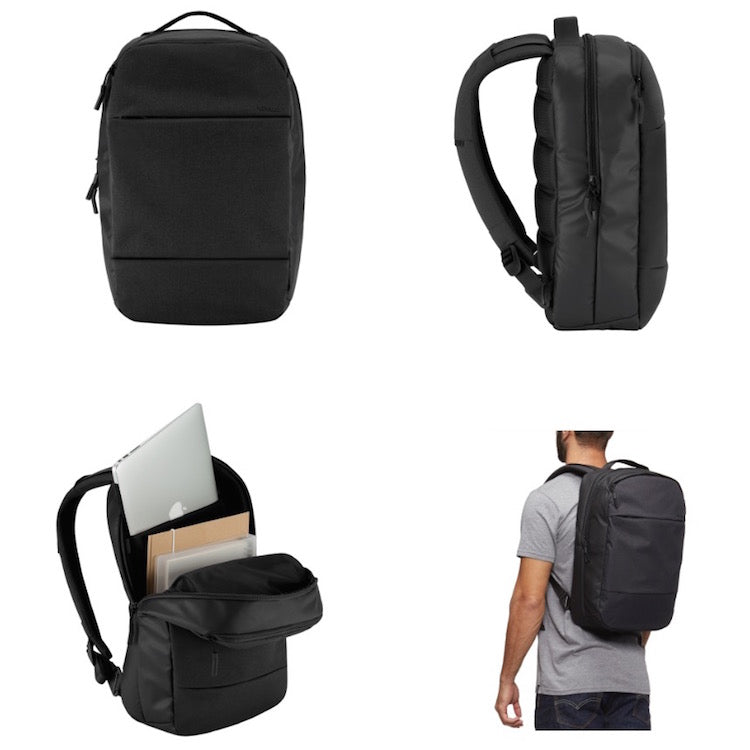
Consumers love 360 views of products because they can see the product better, zoom in for detail and picture themselves wearing or using it. 360 views simply give shoppers more visual information and keep them engaged longer.
Use product photos to sell the quality of the product
Take photos of product details that show the quality of your product’s finer elements. If you are selling garments with an inspiring print, take a close up photo of it. Zoom into the fabric so the consumer can appreciate its quality. Take pictures while stretching the fabric to show durability.
Showcase the most important features
If you are selling lightweight meditation pillows for travelers, take a photo of someone holding one with just two fingers. Show the pillows folded for packing and unfolded for use. Emphasize the comfort of the pillow by showing them in use by people meditating with them on hard surfaces.
Use product photos to answer questions more effectively than product descriptions
Show your product in the context of a complementing object that helps explain it, like a laptop that could go inside a multifunction bag. Display the product being used or in its intended environment. If you are selling VR glasses that link with drone cameras, take a picture of a drone flying over the user while in nature. This kind of imagery packs a lengthy description into just one glance.
Your rainy day photography toolbox
You can never be over-prepared for a photoshoot. So let’s see what you should always have on you to be ready for any situation.
1) Batteries and Chargers -
Make sure you have spare batteries and chargers for all the electronic equipment you are using. There is nothing worse than realizing your camera is out of juice or your mouse’s batteries are drained, and you can’t edit your images.
2) Bluetack
Glue dots’ big brother can come in handy if you have to fix bigger objects in place.
3) Clamps
You can never have enough clamps handy. Use them to hold your backdrop, reflector or your DIY lights.
4) Clothespins
Clothespins can help you collect some the loose garment around a model or mannequin for a better fit, which makes your product look better.
5) Compressed Gas Dusters
Sometimes, though, sanitizing wipes can leave an unsightly smear or stain on the product, especially on a patent leather or plastic handbag. An alternative to clearing off excess dust and dirt is to use a compressed gas duster can. It blows away the grime without damaging the product.
6) Fishing Wire
Fishing line is vital when you are photographing jewelry or other items that can’t stand up on their own. You can hang earrings on it or suspend other small items and then remove the line in post-processing.
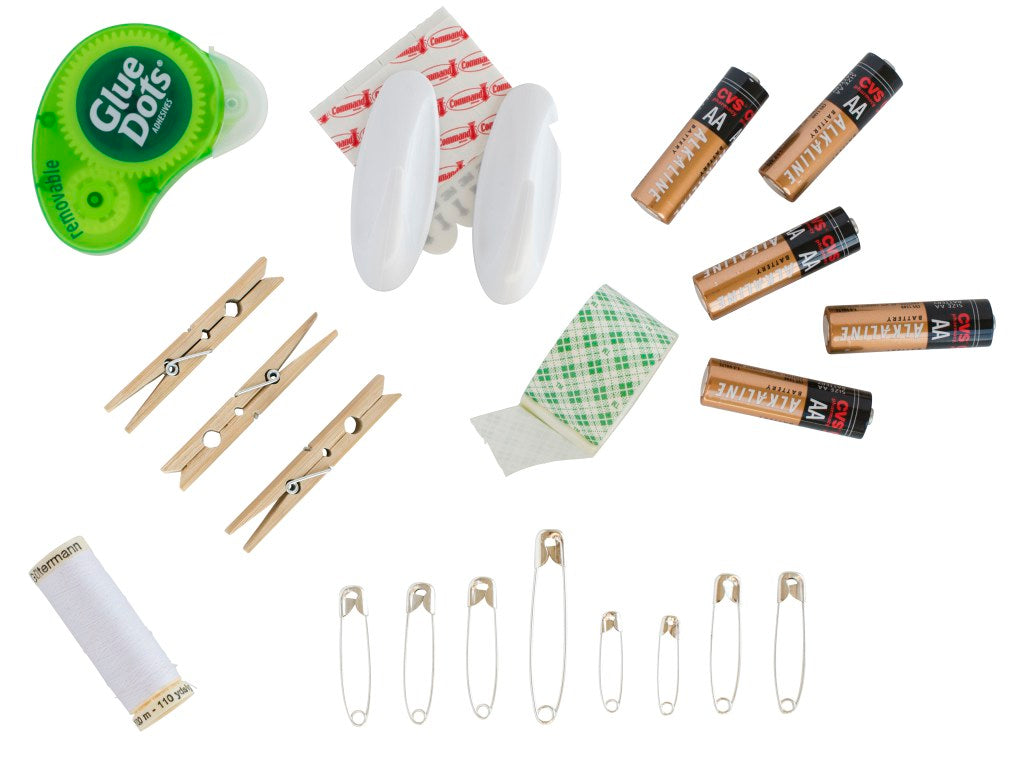
7) Glue Dots
Glue dots can save the day when you are working with small objects and can be a great invisible alternative to tape. They keep things fixed and are easy to remove.
8) Iron
Always keep an iron around and make sure your clothes are wrinkle-free. Your photo shoot may take hours, and you may have to reshoot products you have already piled in the corner. A handy iron can save you a lot of time and frustration. Alternatively, a garment steamer will also do the trick.
9) Pencil and Paper
It may seem outdated, but the good old pencil and paper can save you a lot of time when you need jolt down your shoot setup, camera angle, or simply a reminder to buy new batteries.
10) Safety Pins
Safety pins are the clothing photographer’s best friend and can be used to make small adjustments for a better fit and a better-looking product.
11) Sanitizing Wipes
Your products may have accumulated dust or have a drop of coffee on them, and a sanitizing wipe can do a quick polish.
12) Scissors
In every photography shoot, you are most likely going to need to do some cutting – be it paper or fishing line – so keep some pocket scissors in your toolbox. A pocket knife will also do the trick and save you some frustration.
13) Tape
Tape is probably the most important item in your photo shoot rescue box. Keep as many types as possible and, at the very least, have one strong, one clear, and one double-sided kind. Tape can quite literally save the party.
14) Wooden Hangers and Non-Damaging Hooks
Spare hangers will help you stay organized and keep your clothes in good shape in case you have to reshoot. You can also place your products on them if the need arises. You will also need some hooks to hang those on, of course. Non-damaging hooks let you shoot anywhere without worrying about the walls.
Quick overview of key photography terms
Aperture. The size in the opening of the lens that is measured in f/stops. Small f/stop is a wide opening and large f/stop is a narrow opening. A narrow opening brings a smaller portion of the image into focus while a wide opening brings more of the image into focus.
Aspect ratio. The ratio of the height and width of the image.
Bokeh. The orbs created by lights out of focus.
Burst mode. Machine gun mode, or, your camera snapping photos as long as you hold the button.
Depth of field. Defines how much of the image is in focus.
Digital vs optical zoom. Used to describe your camera zooming capability, digital zoom is achieved through software and optical through your camera hardware. Optical is always better.
Exposure. How light or dark an image is.
Exposure compensation. A way to tell your camera that you want to adjust the exposure.
Focus. Things that are in focus appear sharp and things out of focus appear blurry.
Flash sync. Flash sync decides when the flash fires. You can adjust that for creative effects.
Histogram. A chart that shows how many light and dark pixels are in a photo.
Hot shoe. The slot on top of the camera for adding accessories.
ISO. Reflects how sensitive the camera is to light. Low ISO means not very sensitive. High ISO means very sensitive and can be used for taking photos at low light, like at night.
Long exposure. Means the image has been exposed for a long time
Manual. Allows you to set the exposure instead of the camera deciding automatically.
Metering. A light meter built into your camera helps you when running your camera in manual mode.
Noise. Noise is the grains or flakes that make an image imperfect.
RAW. A file type that gives you more control over editing.
Rule of thirds. A composition rule suggesting dividing the image into three parts both vertically and horizontally. You can then use this grid to place your object somewhere other than the center for interesting results.
Shutter speed. How long the shutter stays open. The shutter is the part of the camera that opens and closes to let light in.
Shutter release. The button you press to take a photo.
Time lapse. A video created from several photos of the same thing taken at different times.
Viewfinder. The hole you look through to take a photo.
White balance. Cameras cannot automatically adjust to different light sources like our eyes. Setting the white balance will make white objects appear white in the photo, rather than yellowed or grayed.
Ready to create your first business? Start your free 14-day trial of Shopify—no credit card required.
About the author
Holly Cardew is the Founder of Pixc, a platform to help eCommerce stores edit and optimize their product photos so they can increase sales. She is also experienced in building and running Shopify stores, and growing large social media followings. In 2016, Holly was included in the Retail and eCommerce Forbes 30 under 30 list. Holly splits her time between San Francisco, Brisbane, and Sydney.