Natural lighting can either be your best friend or worst enemy in a product photography shoot. Nail it, and the results will speak for themselves. Get it wrong, and no amount of editing can save a photo from poor lighting.
Lighting and camera settings determine the outcome of the entire shoot before it’s even started, so a solid understanding of the basics of lighting will help you achieve amazing product photos that you can use throughout your website and marketing efforts.
For most merchants, it’s unlikely you’ll have access to a photography studio and all of the equipment needed to shoot professional product photos. So in this post, we’re going to look at how you can master DIY natural lighting, and create beautiful photos using either a smartphone or professional-grade camera.

Shopify Academy Course: Product Photography
Photographer Jeff Delacruz shares how you can create your own photo studio and take beautiful product photos for less than $50.
Enroll for free1. Find the right lighting conditions
The most crucial part of every photography setup is the lighting, and it’s also the hardest to get right.
There really is no quick fix, or one size fits all solution. Different products will require different lighting, and it’s up to you to figure out what works best for your products. Once you get a handle on the basics, it’ll be a case of trial and error until you find the perfect formula. We’re going to focus specifically on natural lighting.
Natural lighting through a window is the ideal solution for a few reasons. First and foremost, everyone has access to a window. Second, natural lighting coming through a window has a single direction. This generates natural shadows, creating a 3D effect by adding texture to your product, bringing it to life.
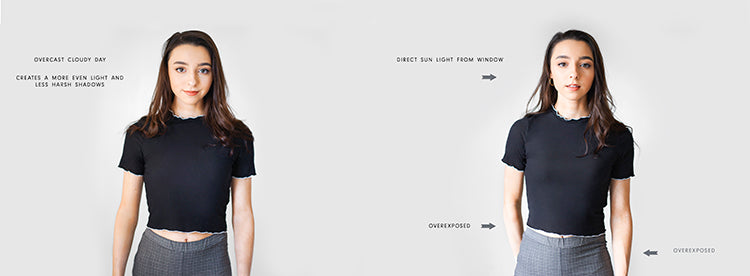
When shooting next to a window, you want to shoot when the day is brightest. Take a look at the weather. Is it a full sunny day or is it an overcast day? To achieve the look you’re going for, full sunlight might not be what you need. This is where practice, and figuring out what look you prefer comes into play. As you can see below, shooting with natural lighting can make quite a difference in the highlights and shadows of your photo.
2. Harness natural lighting
Great natural lighting is essential to achieving perfectly defined images. By controlling the shadows created from natural light, you can add an element of interest to your product photos.
But one of the most predictable things about mother nature is that it’s unpredictable, and so natural lighting is too, often changing from one minute to the next. You need to be prepared for every eventuality.

As the sun changes and moves throughout the day, it affects the way the natural light shines through the window. Finding the best light to shoot your product photos can be a challenge at the best of times. Keep an eye on how the light changes throughout the day to figure out when the sweet spot is for that particular location.
There are three terms you should know when illuminating your subject with natural lighting:
- Front-lit is when indirect natural light hits a product head-on.
- Backlit is when it hits your subject from behind.
- Side-lit is when the light comes from either side of the product.
Whatever angle of lighting you prefer, it's important to note that each one casts a shadow on the opposite side.
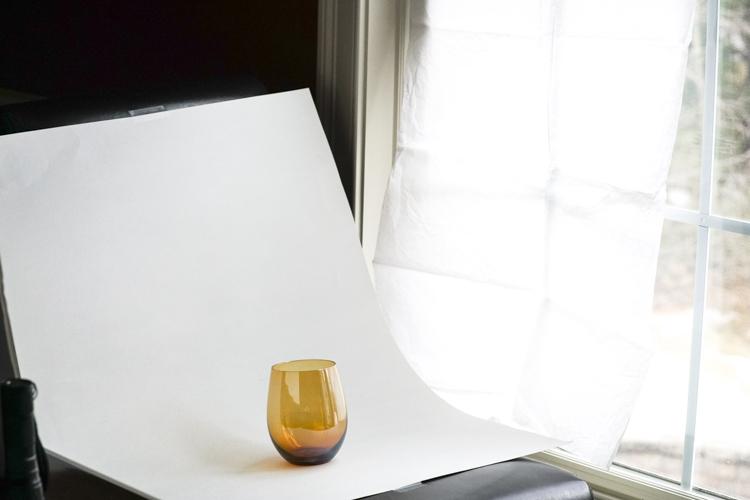
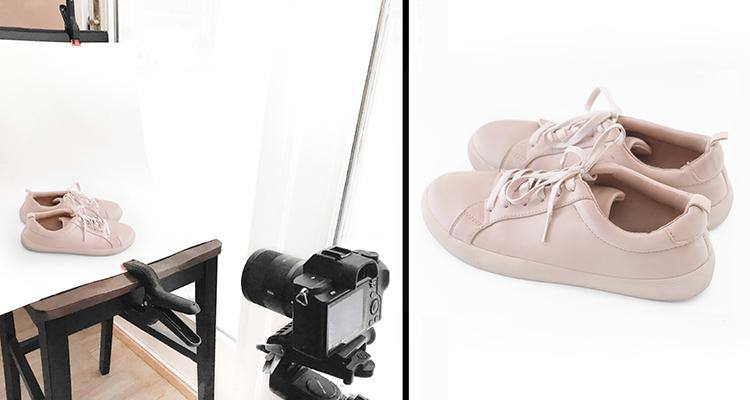
To get started using natural light, place a table or chair next to a large window and prop a sweep (a large white sheet) against the wall. This will provide just the right combination of good lighting and soft shadows. The trick is to avoid direct sunlight as it will result in dark, unsightly shadows.
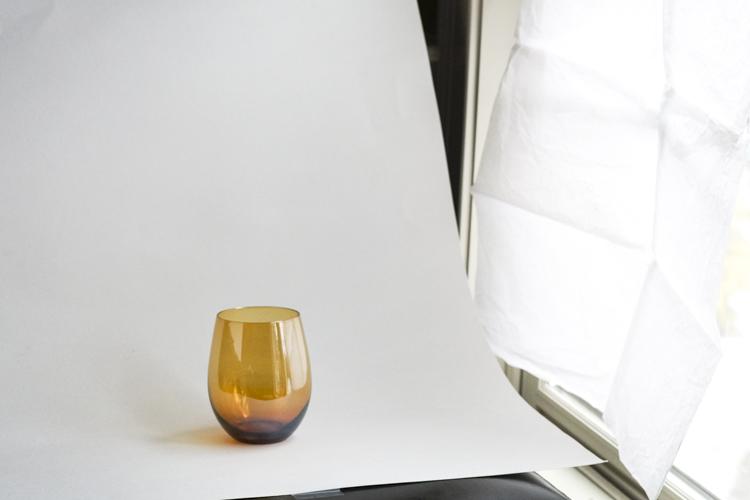
If the sun is too strong, you don’t need to completely scrap a photo shoot. Instead, hold a thin white sheet, known as a diffuser, against the window to diffuse and soften the light to create a less harsh effect. Avoid hard light at all costs as it often makes colors look more saturated, and will highlight even the most minuscule flaw not visible to the naked eye.
How to use a reflector to fill in shadows
If the sun suddenly decides to hide behind the clouds, causing the level of natural light to drop, make sure you have a reflector on hand to bounce and intensify light to fill shadows. A reflector can be a white foam board or any white screen. You can pick up white foam boards from just about any craft store or pick up a reflector on Amazon.
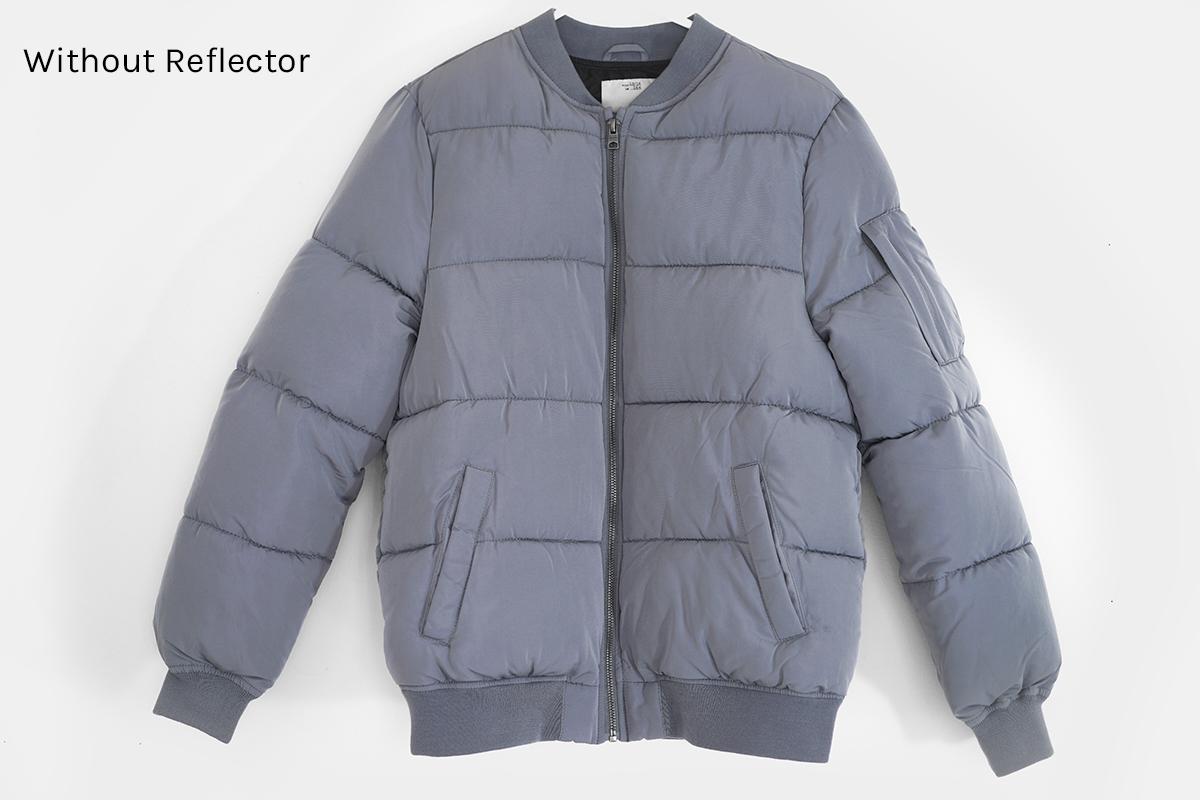
Without enough natural light, the shadows from the creases on this jacket stand out.
If you're using a reflector for the first time, you can control the amount of natural light that bounces back by moving your reflector either further away or closer to your product. Using a white surface helps reflect natural light from the sun back onto the product.

With a reflector, the creases become less prominent as the shadows are filled in by natural light.
Watch where the light is coming from, and bounce the light in the opposite direction. You should shoot directly next to your light source at a 90-degree angle, then reflect that light back onto the subject. This will give your image as much light as possible while also eliminating as much shadow as possible.
For my fashion photography model shots, I always keep the window to the right and my reflector to the left. This helps bounce the light to places where there was little to no light, giving a much softer finish to the photo.
Don't be afraid to play with the angle of the reflector to find the right balance between shadows and lighting. When shooting a backlit product, try placing the reflector in front of the product so the natural light can bounce back onto it.
Side-lit products can produce particularly harsh shadows, so make sure you have your trusty reflector on hand, allowing the light to bounce back on the shadows and soften them.
3. Set up your product background
When shooting product photography, you're going to need an open space for setting up your backdrop: another essential element to achieve great photos using natural lighting.
Your backdrop should always be white, as white reflects natural light onto the product resulting in an evenly lit photo. A white backdrop is especially helpful in the editing process, as it makes it much easier to remove the background.
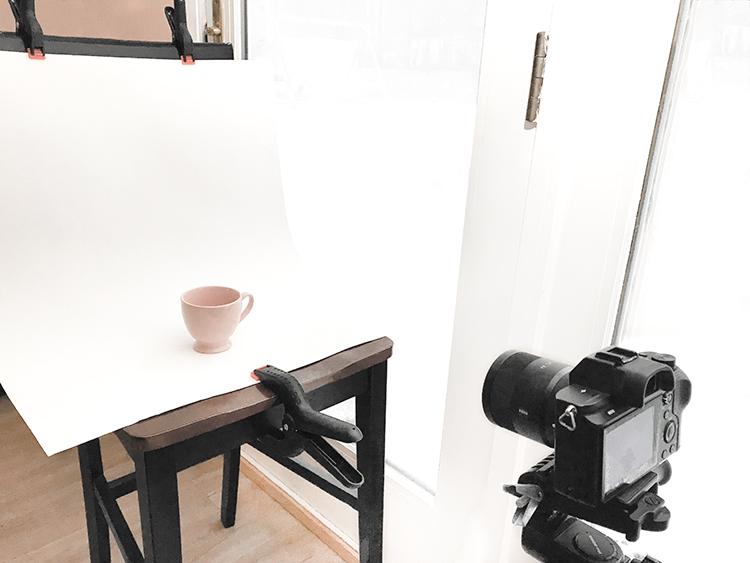
When shooting smaller products, you can either shoot on a table with a large sheet of white paper taped to the wall behind the product. Or you can push a chair up against the wall under a large window. Tape or clamp a large sheet of white paper either to the top of the chair or the wall, depending on what angle you want to shoot from.
If you're shooting bigger objects, buy a roll of white wallpaper and tape a few long strips to the wall. You could even use a large white sheet and let gravity take care of the rest.
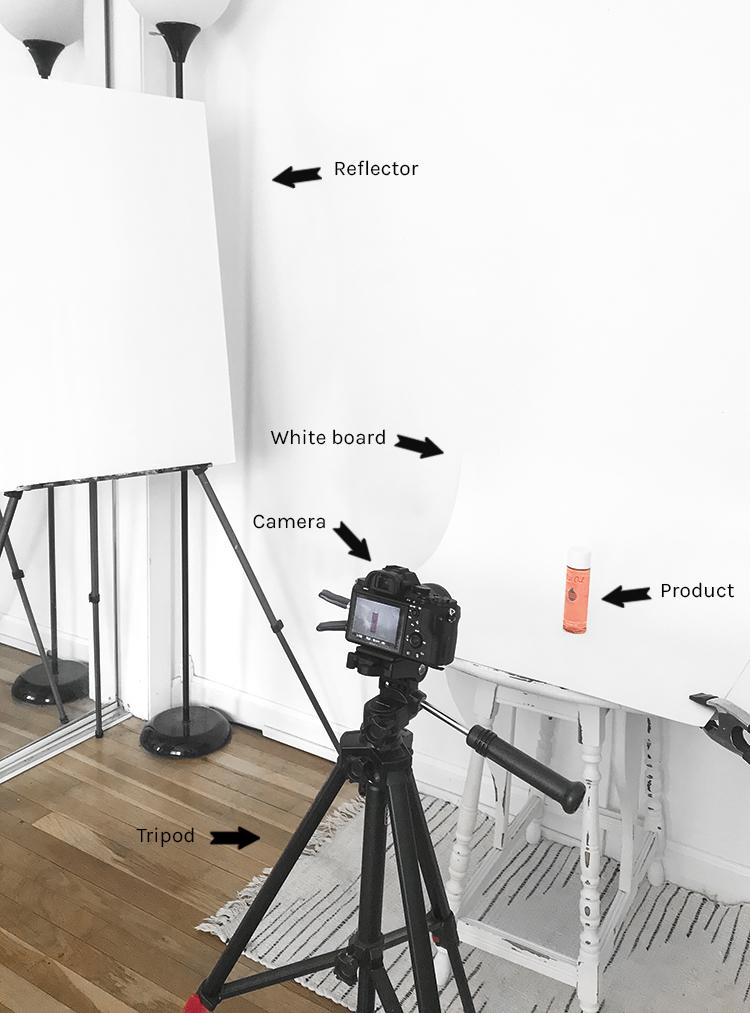
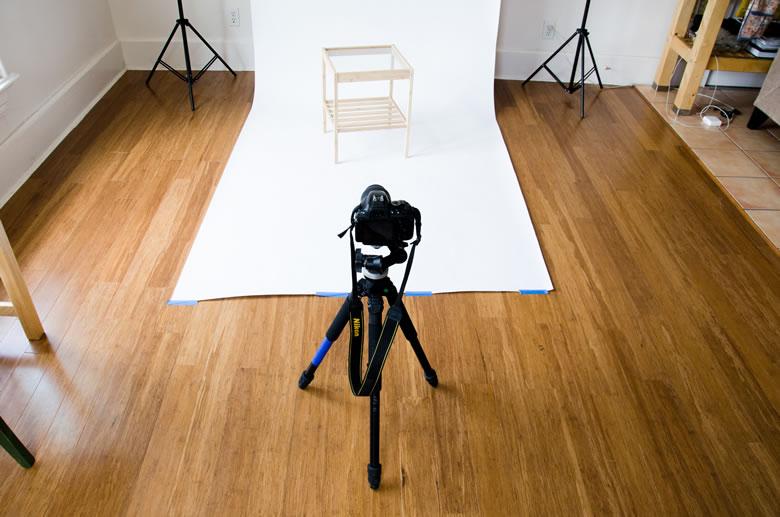
As you can see, I'm shooting against a white wall, leaving plenty of room for a reflector and camera. I used a sturdy piece of white paper and bent it into a slightly curved shape. This helps make the background look seamless and allows the light to bounce back onto the product.
To secure the paper, I clamped it down with some spring clamps from a local hardware store. If you don't have any clamps, you could always just tape the paper to the wall and tape the bottom to the ground, creating a slight curve in the paper.
It's essential to secure your backdrop to ensure nothing moves during the photography process. This helps achieve consistent results; even the smallest change will affect the reflections and shadows.
4. Explore different camera angles
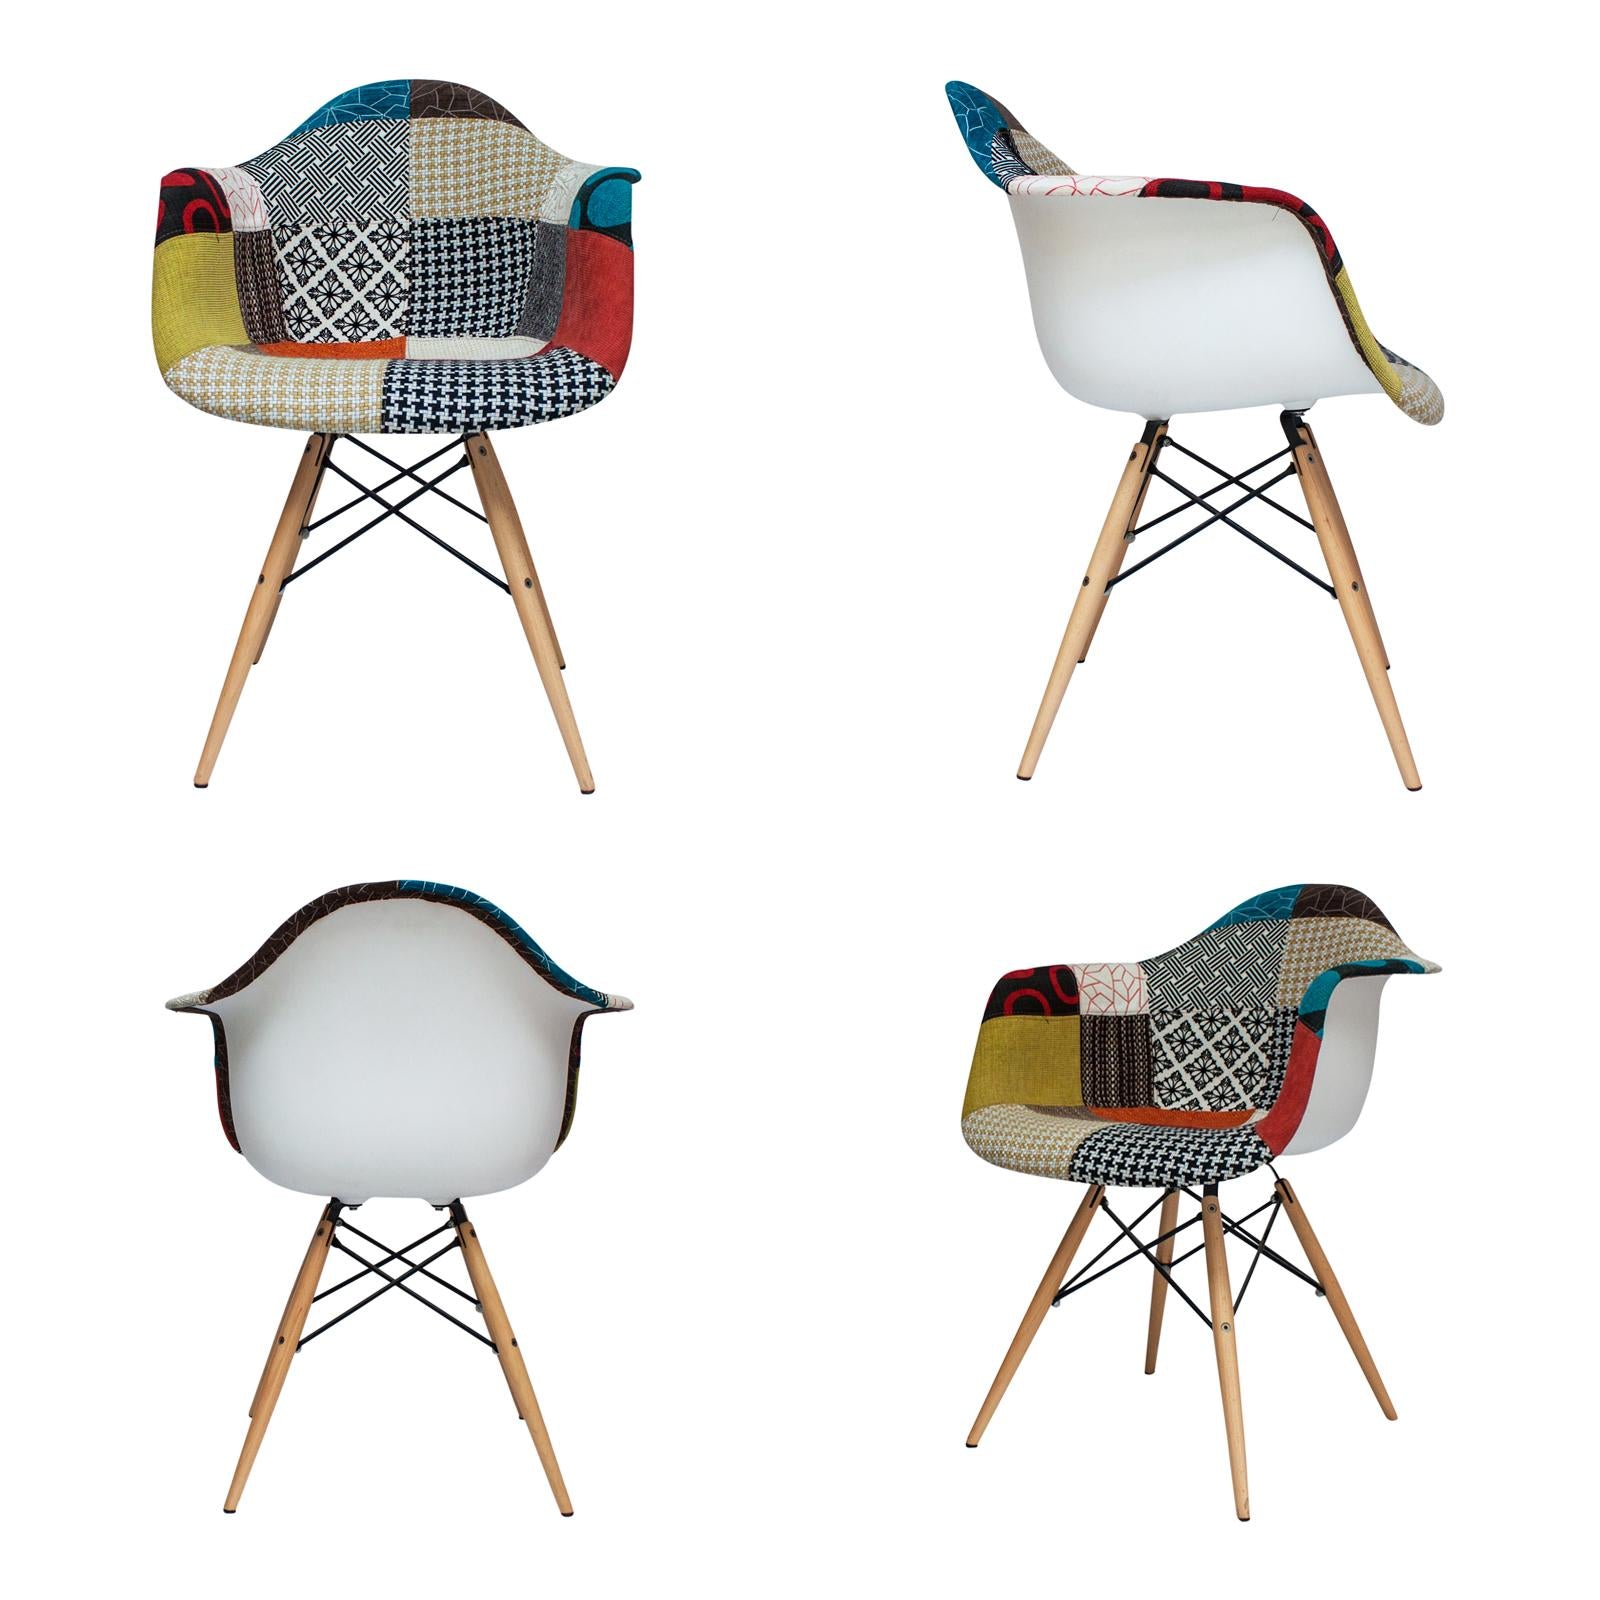
Through your product photos, you need to visually answer any questions that your product descriptions don't fully explain. That’s why having a variety of camera angles is so important.
Give customers as many different perspectives to help showcase the key features of your product. The ultimate goal is to shoot your product from every angle, giving customers a 360 degree view of the product. Providing an all-around view is significantly more engaging as you're visually providing extra product information, helping customers picture themselves using or wearing your product.

By taking product shots from different angles, you'll also inject some character and creativity into your photos. As a rule of thumb, your main hero image should be an eye-level head-on view of your product. It's recommended to have anywhere up to 12 additional supporting images highlighting the most important features.
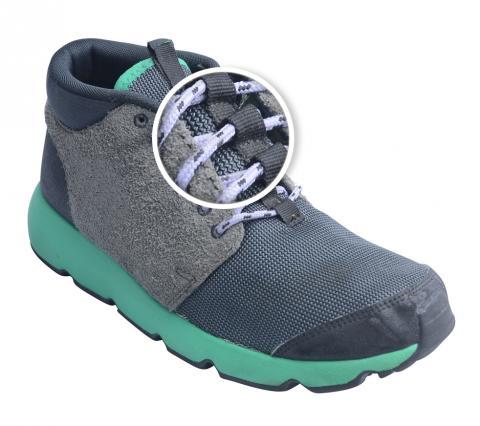
If you're not sure what features you should capture, focus on features that showcase the quality of your product. Take close-ups of the fabric, print detail, texture, or even your products being put to use. Be sure to highlight the more detailed elements of your product that customers might want to inspect.
For anyone getting started with product photography, it's highly advisable to move the product around rather than moving your camera. Keep your camera and tripod in the same spot, and change the angle of your product instead of having to move your camera. Keep the product in roughly the same place each time, just rotating its position. This means your final shots will all be framed the same. And you'll maintain consistency, reducing post-photography editing.
For anyone with a bit more experience or even those with a very steady hand, you could play around with a variety of tripod-free camera angles. Try shooting the product from above instead of directly in front. Shooting from above allows you to include more items in your photo. This is particularly useful when you want to showcase a product line or in-context photo. Or why not have a go at shooting from a low angle, making the product look bigger?

These are the main camera angles you should be aware of and experiment with in your photo shoot:
- Eye-Level: Shows the product exactly the way we see it in reality. This is recommended for your hero image.
- High Angle: Shows the product from above, as if you're looking down at it from an angle.
- Low Angle: Shows the product from below, as if you're looking up at the product.
- Bird’s Eye: Shows the product directly from above, as if you're standing over the product.
- Slanted: Shows the product from one side, as if you’re looking side-on at the product.
5. Use your camera’s manual settings
The beauty of using a professional camera to shoot is that you can control every single aspect of the photo through various settings. But before you even get started with settings, you need to get your tripod set up. Using a tripod is essential to getting the most out of your camera settings. For those who don't have a tripod, a stack of books will do.
A tripod is necessary because it provides stability, minimizing tiny movements that can ruin a great photo. I'd recommend you make sure your tripod is in line with the product you're shooting, as this makes it easier when tweaking the settings as you take photos.
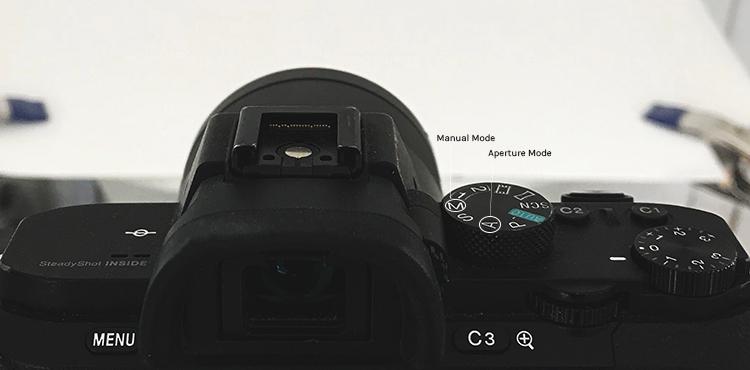
To achieve the best results, I'd recommend always shooting in manual mode. Mastering manual mode lets you adapt to your environment, whether it's outdoors or an indoor studio, and shoot top-notch photos in a variety of lighting conditions.
Shooting in manual mode gives you the power to control all settings, without worrying about the wrong automatic setting being used, like the flash. The main settings you should master to make the most of natural lighting are:
- Aperture
- ISO
- White balance
- Shutter speed
Aperture
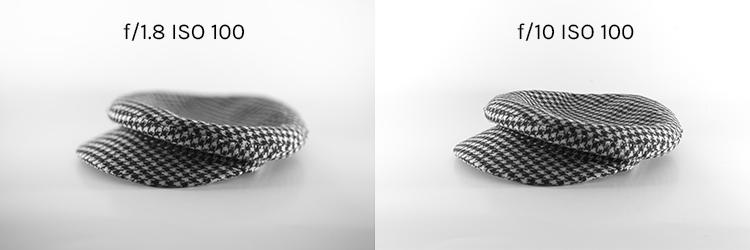
First, we'll look at aperture. I'd recommend you use a higher f-stop because it helps keep every detail in focus. I prefer to shoot between f/8 and f/14 as this keeps the entire product in focus without losing too much light.
If you want to make sure the entire product is in focus, use a setting above f/12. Some cameras may not go that high, so just use the highest setting available. Ultimately, the higher the aperture the clearer the final photo will be.
ISO
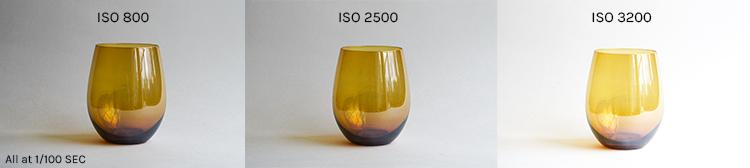
Next, let's get to grips with ISO. The ISO setting manages the camera's reaction to light. The lower your ISO, the less sensitive the camera is to light and the higher the image quality. But when the ISO setting is too high, images start to look grainy or pixelated. When shooting in a dark environment, a higher ISO is needed, but the goal is to find a good balance between improving the lighting and the image quality.
Once you get the right ISO setting according to your surroundings, you'll achieve beautifully crisp product photos. My studio has excellent natural lighting, so I usually stick to an ISO between 300-500 depending on the weather outside. On a particularly cloudy day, I turn my ISO up high to warm the sensors up and then adjust it until the image is nice and clean.
White balance

Choosing the right white balance will mean your camera accurately adjusts according to the color of your product in conjunction with the light. For beginners, you probably want to use the automatic white balance setting, so the camera automatically chooses the right setting according to the lighting.
Once you start getting a bit more confident with your camera settings, I'd suggest you manually select the white balance setting that most accurately reflects what you see. The goal is to get as close a match between what you see in your camera viewfinder and your eyes. Despite being a huge amplifier of natural lighting, it does take some getting used to and adjustments.
A sudden increase in sunlight or even particularly harsh sunlight can leave your images being overexposed. An overexposed image is tough to correct in post-photography editing—especially if you're using a free photo editing software—as the detail is not crisp enough due to the harsh lighting. Follow the advice above about harnessing natural light , and you'll have no problem working around it.
Shutter speed
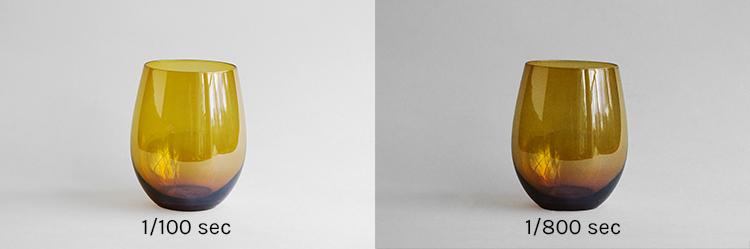
When you've set the aperture, ISO and white balance, you can finally set your shutter speed. The shutter speed will decide how long the shutter is open when taking photos. Longer shutter speeds help the camera pick up more light, which makes for a beautifully crisp photo.
My top tip for getting the most of your shutter speed, and all the camera settings, is to use a tripod. Keeping the camera stable allows all the settings to work together cohesively, leaving the camera’s internal light meter to do its work, resulting in picture perfect product photos.
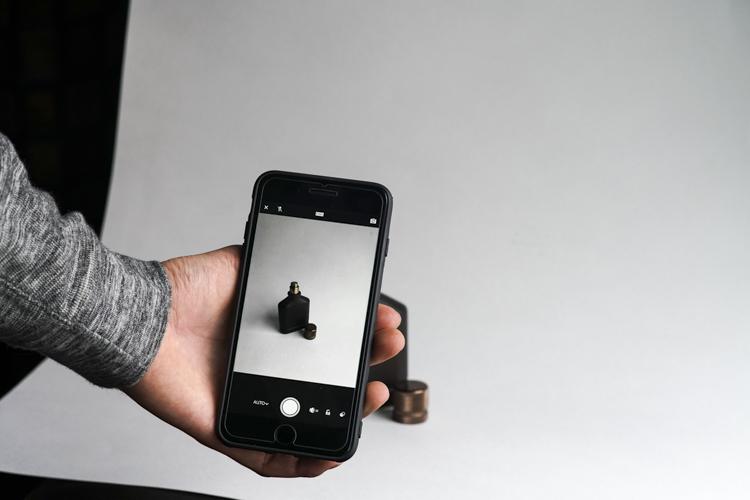
Manual settings for a smartphone camera
There's no denying that using a professional camera is the ideal solution when taking product photos. But, don't let that hold you back. Smartphone technology is advancing year over year, and most of them have excellent built-in cameras. At the very least you can take some good-quality photos, and leave the rest up to editing.
A few key tips when shooting product photos with your smartphone:
- Avoid the zoom feature as this significantly reduces the quality of the image
- Avoid blurry photos by investing in a tripod for your smartphone
- Avoid the selfie camera as the front camera is not as good at the back camera
- Avoid using the flash as this will overexpose your photo and distort the colors
- Avoid distracting or dark background, always shoot against a plain white background
- Avoid over editing as this reduces the quality of the photo, minor adjustments only
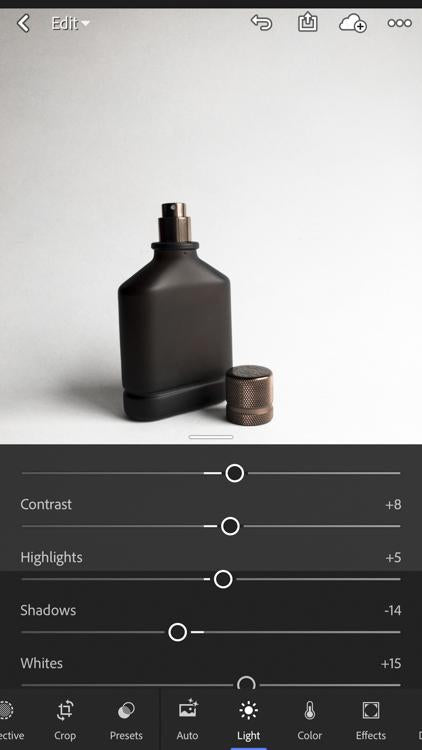
Numerous apps can help you get results similar to a DSLR camera. The one I often recommend is Lightroom CC. Within this app, you can control settings such as file format, choosing between JPEG and DNG. DNG provides more information about the image and produce a better quality photo. The downside of using DNG is that it takes up more storage space on your device.
Other factors you can adjust are aspect ratio, timer, grids, and levels, as well as highlight clipping, which shows you precisely what is overexposed in the image. Once you've taken your images, you can adjust color, exposure, tone, and contrast within Lightroom CC.
I recommend that you downloaded Lightroom CC on your desktop so that you can sync your photos between your desktop and mobile app. I prefer editing photos on the desktop version as I have a bigger screen and can get a closer look at what needs to be fixed.
6. Shoot your product photos
Now that you've got everything set up, it's time to start taking photos. Undoubtedly you'll have to adjust things throughout the shoot, but practice makes perfect. Have fun and embrace your creativity. Shoot lots of photos in a variety of different angles, making a note of the settings you used and what they produced.
Take time between different angles to review the images to see if you need to adjust any settings. If you have time, I'd suggest you upload them to your laptop or computer throughout the shoot so you can get up close and personal. Once you've chosen the best photos, it's time to edit.
To learn more about the basics of photo editing, check out this section of Shopify’s DIY Product Photography Guide.
About the author: Rachel Jacobs is Head of Content and Partnerships at Pixc, a leading eCommerce product optimization service. Pixc transforms average product photos into professional images designed to increase conversions.