
In times when just about every brand is going online, your brand’s perceived value is judged based on the quality of how you present your products. It’s no longer about the deals and discounts, but also how good your products look because if there’s one thing that a consumer cannot do right now, it is - not being able to get a physical look and feel of the product.
75% of online shoppers rely on product photos when making a purchase decision.
Now if you’re wondering how you could possibly get professional product photography done, fret not.
All you need is your smartphone!
In this guide, we’re going to walk you through why you need great product photos, how to make your product photography attention-grabbing and some tried and tested at-home product photography tips. All using your smartphone.
Let’s first start with the equipment you need for at-home product photography, even if you're using a smartphone.
5 Things You Need for at-home Smartphone Product Photography
1. Smartphone (or a camera)
The primary equipment you need is a camera or a smartphone to capture these images. While most use a professional DSLR, any high-quality smartphone will do the trick!
Test out your smartphone’s camera by checking its megapixels, the resolution it provides, and any image stabilizing features it has.
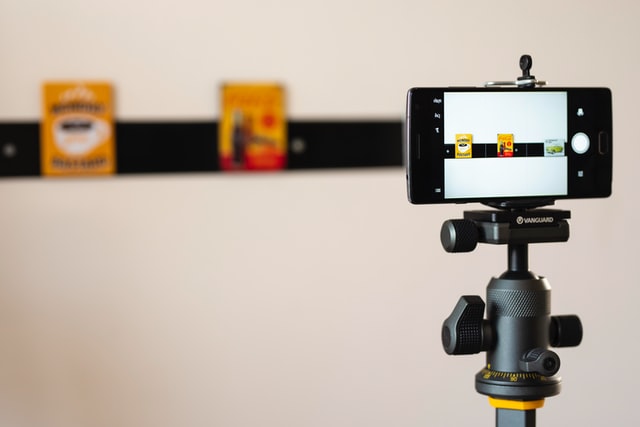
2. Tripod for hands-free and steady photos (optional)
A tripod can help you keep your frame steady and help you stay hands-free as you move the product on your frame or make adjustments within your frame.
While it isn’t a necessity to use a tripod, they can help in low-light situations by staying steady for longer-exposure shots.
3. Background boards
Set up a white background board to shoot your product against. This board will help you capture clean images and add color contrast to the object to make it pop. These background boards are easier than hunting a specific location for your shoots.
4. Lighting setup (optional)
Natural light is obviously better but it is not controllable. If you want more control over the light source, you can rent out artificial lights to help you manipulate and control every aspect of your photoshoot.
You can also consider getting a photo studio lightbox. It’s like a portable photo studio with just the right amount of lighting to enhance your products in the pictures. You can get it here.
5. Editing apps
The right editing app can help you retouch your product photos and make them look more professional. Now, there are thousands of apps that you can use for product photography editing, but here are some of our favorites:

Lightroom
If you’re following a theme or want to create one that can be used on the store site as well as on social media, this app is for you. It lets you make selective adjustments while editing, adjust the geometry and the composition of the product image, heal certain aspects of the images, make batch edits and also sync presets and profiles to make future editing easier.
Snapseed
Another photo editing app that has found a place in many hearts is Snapseed. It is a professional photo editor developed by Google that offers 29 editing tools and filters, including healing, brush, structure, HDR, perspective, and much more.
Photoshop Express
Another Adobe product, you can use the Photoshop Express app to crop, fix red eyes, add effects, adjust tones, and more on your product images. It’s one of the best free photo editors and you can always make in-app purchases to use more advanced editing features.
Looking for more photo editors? We created a list of 25 best online photo editing softwares, services, and apps. Check them out here.
And that’s all. Now, let’s get started!
Here are some at-home smartphone product photography tips you need to keep in mind.
Tips for at-home Product Photography on Smartphones
Capturing high-quality images is easy, even at home. With just 8 steps, you can capture product images that are optimized for your product pages.
1. Use a high-quality smartphone camera
Professional photography is commonly done with a high-end DSLR camera. These cameras are built to provide the kind of quality you need in your product images.
However, very few people own a DSLR camera. In the age of smartphones, there isn’t even a need for a DSLR. When capturing your product images, ensure that your smartphone has highly rated camera features. Your smartphone's camera features need to provide high image quality, more megapixels, image stabilization, and natural contrast quality.
PS. Make sure you clean your smartphone’s camera. Many times a thumbprint from holding the phone may result in hazy pictures.
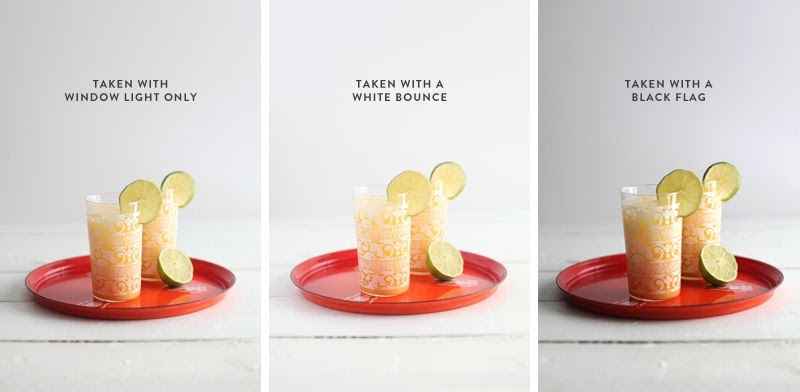
2. Use natural light to capture pictures
Lighting is the most important part of any photoshoot. Good lighting can help you capture clear photographs of your product.
Natural light is the cheapest and best option when capturing your product photos. The best source of natural light is by placing your photography set up next to a large window. You can also use a reflector or bounce board to balance out the light and ensure that your image isn’t dark on one side of the image.
Alternatively, you can also get a lighting setup for artificial light.
Also read: DIY natural lighting for product photography
3. Set up a frame
Your frame can help you understand how to place your product within the image, what other elements you need in the product image, and how you can make the product stand out.
Setting up a frame allows you to plan your images ahead. If you have multiple product images to capture, you can list the different types of frames you want based on what you want to show your shoppers.
Pro-tip: Test out your setup and see how products would look within the image a day prior. This can help you understand that you don’t lose light testing different frames on the day of the shoot.
4. Use the grid feature of the smartphone camera
A grid is a setting on your smartphone camera that shows lines/grids. This will help you assess the proportions of your subject, in this case, your product while clicking its picture. It lets you follow the rule of thirds easily even if you’re not a professional photographer.
The rules of thirds helps you capture the product (subject) in a way that enhances its looks. It involves breaking an image you want, into thirds, horizontally and vertically, so that you have nine equal parts.
5. Ensure your shadows are kept to a minimum
Shadows can make or break your images. High-contrast shadows create a harsh effect on your images. These are often caused by shooting during the midday harsh sunlight.
Here are a few ways to keep your shadows low:
- Shoot your photos early morning, late afternoon, or before sunset
- Avoid using filters or settings with high contrast
- Use a reflector (or a makeshift reflector with a whiteboard) to lower the shadow
- Remove shadows during your touch up or editing stage
But of course, if it adds a little element to your product pictures, feel free to experiment with the angle of the shadow in such a way that it makes the product pop out. If you do end up using shadows, remember to keep it consistent across all your product images. You might have to plan all your product photography shoots accordingly.
Here’s an example:

6. Use a sweep background
A photography sweep is a seamless background that removes any horizon lines from your product images. With a product image, you want to ensure that shoppers are not distracted away from the product you are depicting. This seamless background ensures that all eyes are on your product!
You can build your own sweep background by using a large white paper and placing it against your wall and curving it towards the table/floor.

7. Remove distracting elements with the background removal app
Taking pictures on the go often means capturing unwanted elements as well. You could be trying to capture a cup in your hand but your backdrop either has too many people or jam-packed parking that is too distracting from the product. This is when you need to remember removing the background after clicking a picture.
By removing the background from your product pictures, you enable easy integration across all sales channels, increase attention on your product, and improve the page loading speed.
Now removing product image backgrounds can be tricky. Too close to the product and you may lose its essence. Too far from the product and there are still too many distracting elements. To make this easy, install the Shopify background removal app.
If you're comfortable using photo editing apps, also read our guide on how to remove product background here.
8. Clean up your image with photo editing apps
Now that you have all the product pictures ready in your phone’s Camera Roll, take some time to sift through the batch. Pick out the ones that stand out to you when you view them in a grid mode. If you’ve clicked 10 pictures for each product, the idea is to shortlist about 5 that show different aspects of the product in the best way possible.
Once you have the product images finalized, it’s time to make them shine! A little editing can help your product pictures look more professional. Editing apps like Lightroom, Snapseed, and Photoshop Express can help you retouch your images, add more consistency across pictures, and add a little personality to them.
If you want a consistent look to all your images, you can edit one image, create a preset within your editing app, and use this preset filter across all images.
Note: Presets are settings that are applied to a photo, enhancing the image with just a click of a button. The presets help edit each photo quickly with just a few tweaks, sometimes none at all.
9. Optimize image sizes
Before exporting your images from your editing app, check what sizes are recommended on your Shopify theme for product images. You can follow this sizing to keep optimize image sizes for all your product images and keep your product pages consistent.
Note: Image sizes for product pages differ according to the theme. By default, On Shopify, you can upload images of up to 4472 x 4472 pixels with a file size of up to 20 MB. They recommend using 2048 x 2048 pixels for square product photos.
But that’s not all. When you’re clicking pictures of your product, you also need to ensure you’re taking every perspective into account. You need to ensure that the unique selling proposition of your product stands out.
Here’s how to do that.
How to Make Your Products Stand Out in Your Product Images
1. Upload multiple images
When planning your product photography, think of what your shoppers are expecting. Shoppers want to see the product from multiple angles, they want to see the product in-context or in use, and they want to understand its sizing. Upload multiple images of the product to provide a comprehensive experience for shoppers.
Here are 4 types of product images you should consider adding to your product page:
- Product within the context of your environment: Show the product being used or placed within its natural environment. For instance, if this is a shirt, the product would be worn by a model. Most Shopify stores add this product image as the first image on their product page.
- Product images from multiple angles: These images will show only the product in focus, providing shoppers a look at every part of the item. Many stores display 4 to 5 images of the product in focus.
- Product in comparison to a human (along with size and dimensions): Many stores add a comparison image to show how the product looks next to a human. Such images are apt for stores selling furniture.
- Product feature close-ups: You can add more product images to show the different features of the product.
2. Show the product in context to its environment
A product in-context image shows how the product looks within a real environment. While a product in focus image lets shoppers see the smallest details about the item, an in-context image lets shoppers visualize the item, making the product more desirable.
Here are some tips for in-context product photography:
- Show how the product can be used by shoppers. For instance, someone wearing a dress or a piece of furniture set up within a room.
- Add accessories that complement the item (like flowers, etc) to make the image more attractive.
- If the item is worn or used by someone, ensure that the model looks like the target audience you have in mind. For instance, a smartwatch would be best suited on a young and tech-savvy individual rather than an older person.
For example, here's how Heads Up For Tails does it:

3. Make your product images consistent
When capturing product images, ensure that the images across your Shopify store are consistent with each other. Here are some ways to ensure this:
- Photograph your products only during a specific time so that the light stays consistent. You can also get an artificial lighting setup to help you.
- Use the Shopify background removal app to remove any background from your images.
- When editing images, create a preset that you can use across all images to add a consistent tone and style to your images.
Here's an example from Fabuliv. While they use different backgrounds, they edit the images to give a similar look across the store:

4. Keep the product as the main focus
When photographing your products, ensure that the product is the main focus in the frame. You never want your shoppers to be confused about which products they are shopping when they are looking at your product images. Many stores make the cardinal mistake of displaying multiple and similar products in the frame. This is usually common for in-context images.
Keep your frame clutter-free and keep your product in the middle of the frame.
5. Show different features/ perspectives of the product
Remember the idea behind adding product pictures to your product pages is to give the shopper a full-blown aspect of what it looks like. That’s why you need to make sure that you’re clicking pictures from different angles. Make sure that these angles enhance the unique features of your products.
For example, if you’re selling furniture online, here are a few ways to show different features of your products:

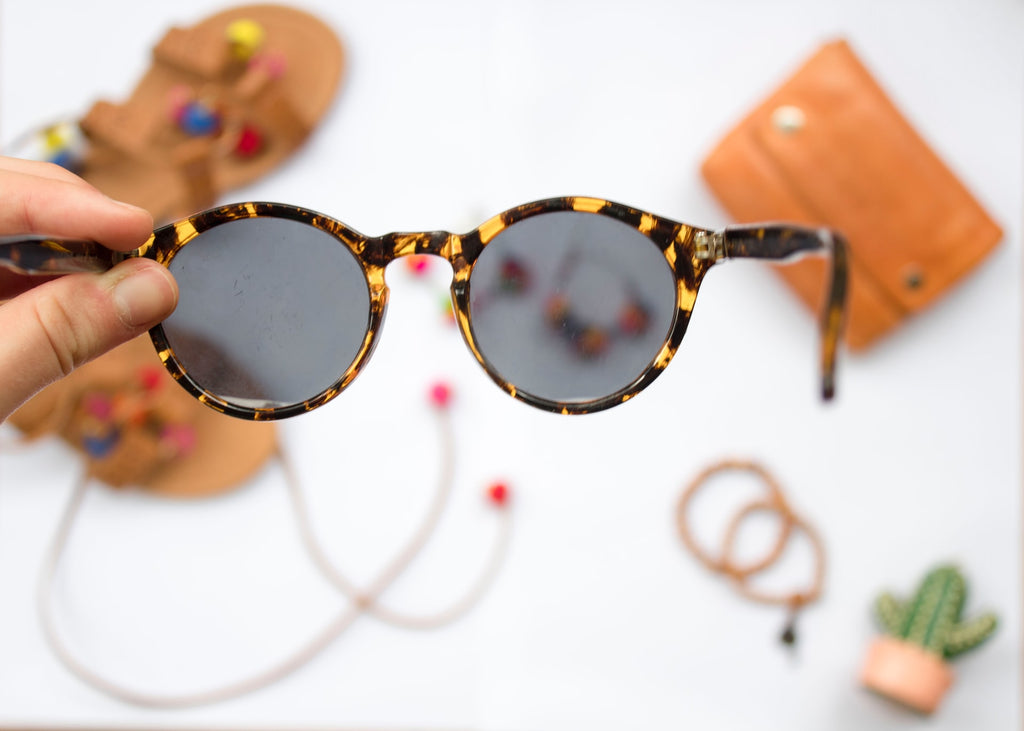
Or when you're selling footwear:

6. Ensure your product image is of high-quality
And no matter what you do, never ever upload a blurry image. If the product pictures you took are not clear enough, consider re-capturing them instead of trying to make do with what you have. If your smartphone’s camera isn’t up to the mark, maybe request a friend or a neighbor to help you out with the same. You could take pictures on their phone and then later make edits on yours.
Think smartphone product photography is too much of an effort? Wondering if you should pay heed to so many tips and how-tos while clicking product images for your store?
The answer is YES. But let us tell you why.
Why is Product Photography Important?
Product images are what your shoppers first see. Shoppers use the product image to see if the item matches their expectations, helping them understand the color, size, style, and other qualities to decide if the product is right for them.
75% of online shoppers rely on product photos when deciding on a potential purchase.
Your product images convey the quality of the product and make shopping experiences on your Shopify store more convenient. While shoppers on online stores can't touch and feel the product, product images can help bridge this gap a little by showing how the product looks from different angles.
Without accurate product images, you are sure to see higher returns and lower satisfaction rates. In fact, 22% of returns occur because the products look different in person. Think about the last time you ordered a product in a said color but it ended up being something totally different?
When you focus on your product images, you help shoppers make better purchase decisions. And that results in increased conversions and sales.
But more importantly, it also helps you reduce your return rate, addressing the challenge of high RTO that most online stores face today!
Is It Time to Upgrade Your Smartphone Product Photography?
The new-age consumers are choosing to shop online for practically everything. Right from their day-to-day grocery, fashion and apparel, and other products. One of the key factors that they do rely on to make a purchase are your product pictures. While they can’t feel the product physically, your product pictures give them an insight into what they can expect from it.
So we say, YES.
If you’ve been relying on your smartphone to click product pictures for your Shopify store, it’s time to pay a little more attention to them.
Got your product images ready, but don’t have an online store yet?